12 minutes
CloudLab : AWS + Terraform + Ansible + Rancher
Introduction
In this article, I will use some “devops/cloud” technologies I am already used to, like Terraform, AWS or Ansible, and also, others like Rancher. It’s been a while since I was looking to find some time to play with Kubernetes.
As I am comfortable with AWS, VMWare and Microsoft classic virtualization, I had choosed to also use Terraform to get a first step into Kubernetes.
Walkthrough menu :
AWS ELB and Auto Scaling using Terraform
AWS CLI
Terraform deployment
Rancher deployment on AWS EC2 instances
Ansible playbook
Pre requisites
For this lab, I will use my Mac to push the modifications and all commands.
I will also assume that you know what are AWS, Terraform, Ansible, Rancher and Kubernetes (will used RKE for the last one).
AWS
AWS IAM
Prior to start, you will need an AWS account. You can create one for free and use t2.micro instances, in the limit of 750 hours by month for free too.
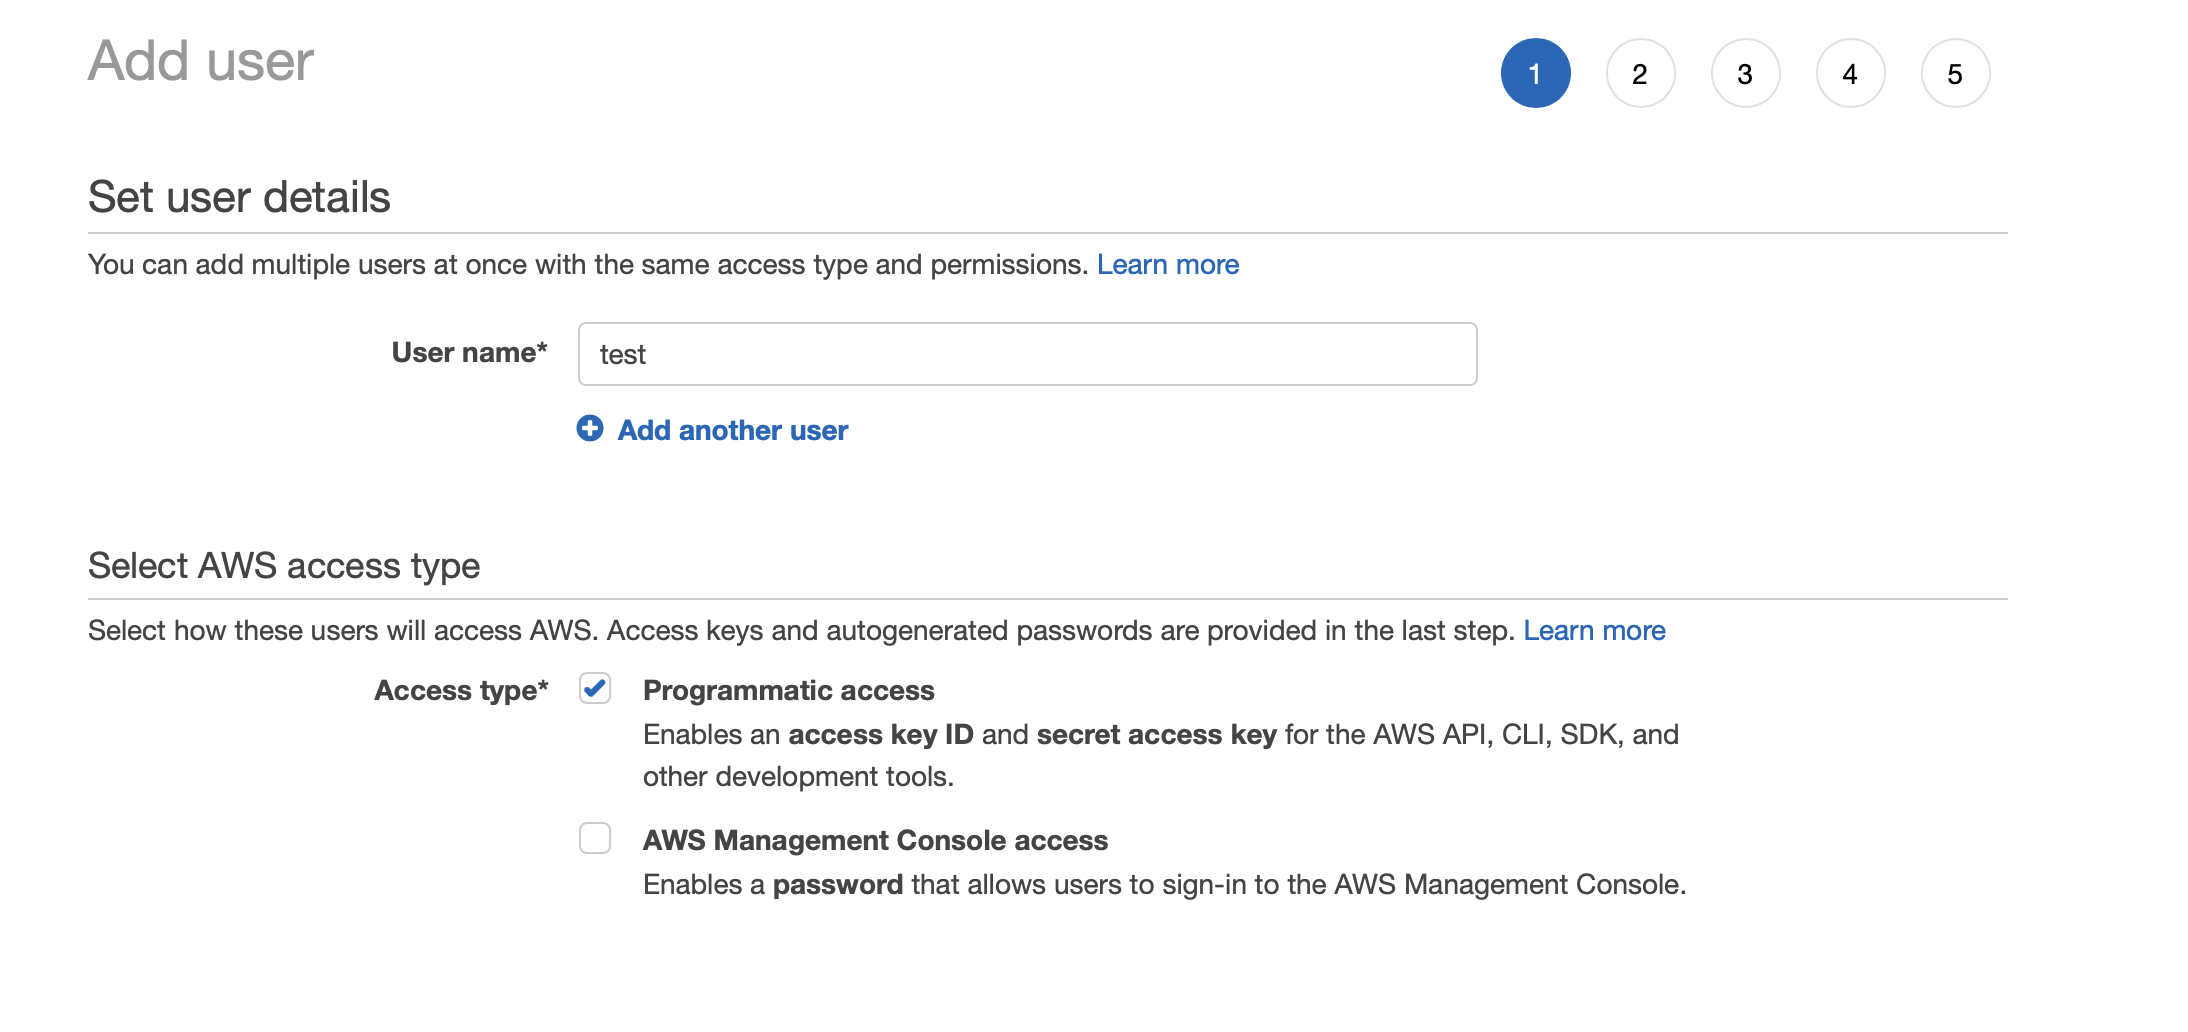
Then, you will need to go to the IAM menu in AWS and create a user with programmatic access from the console :
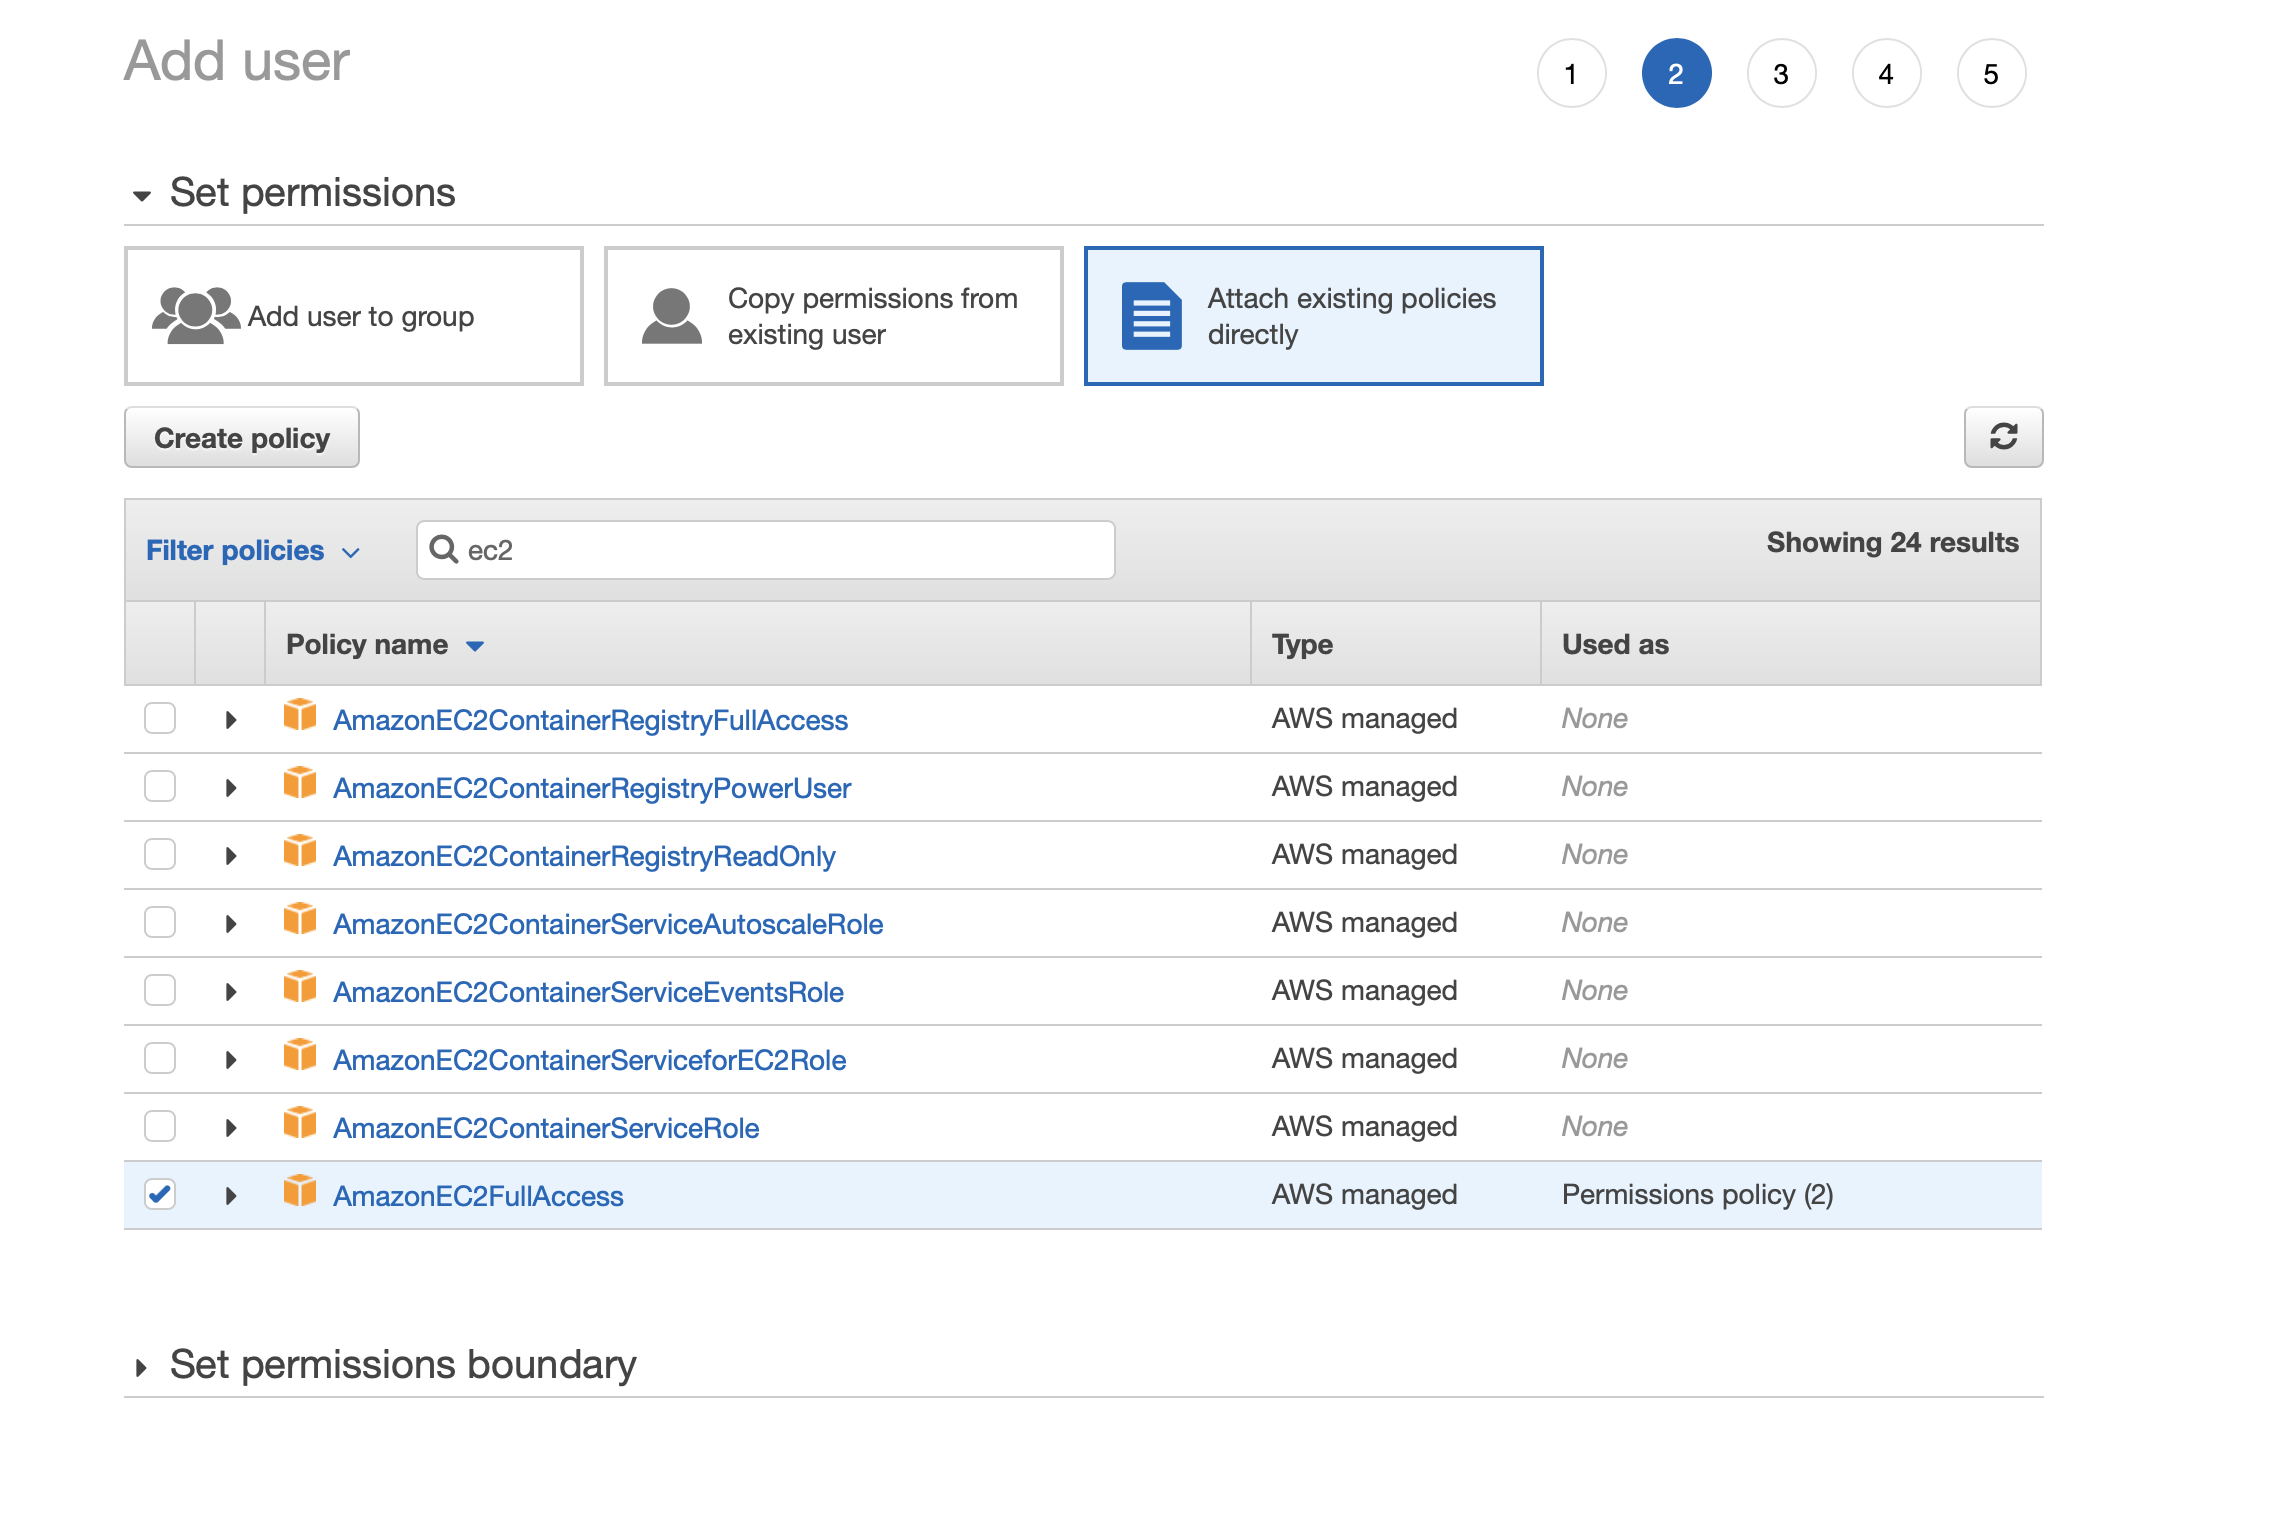
I assign EC2 rights :
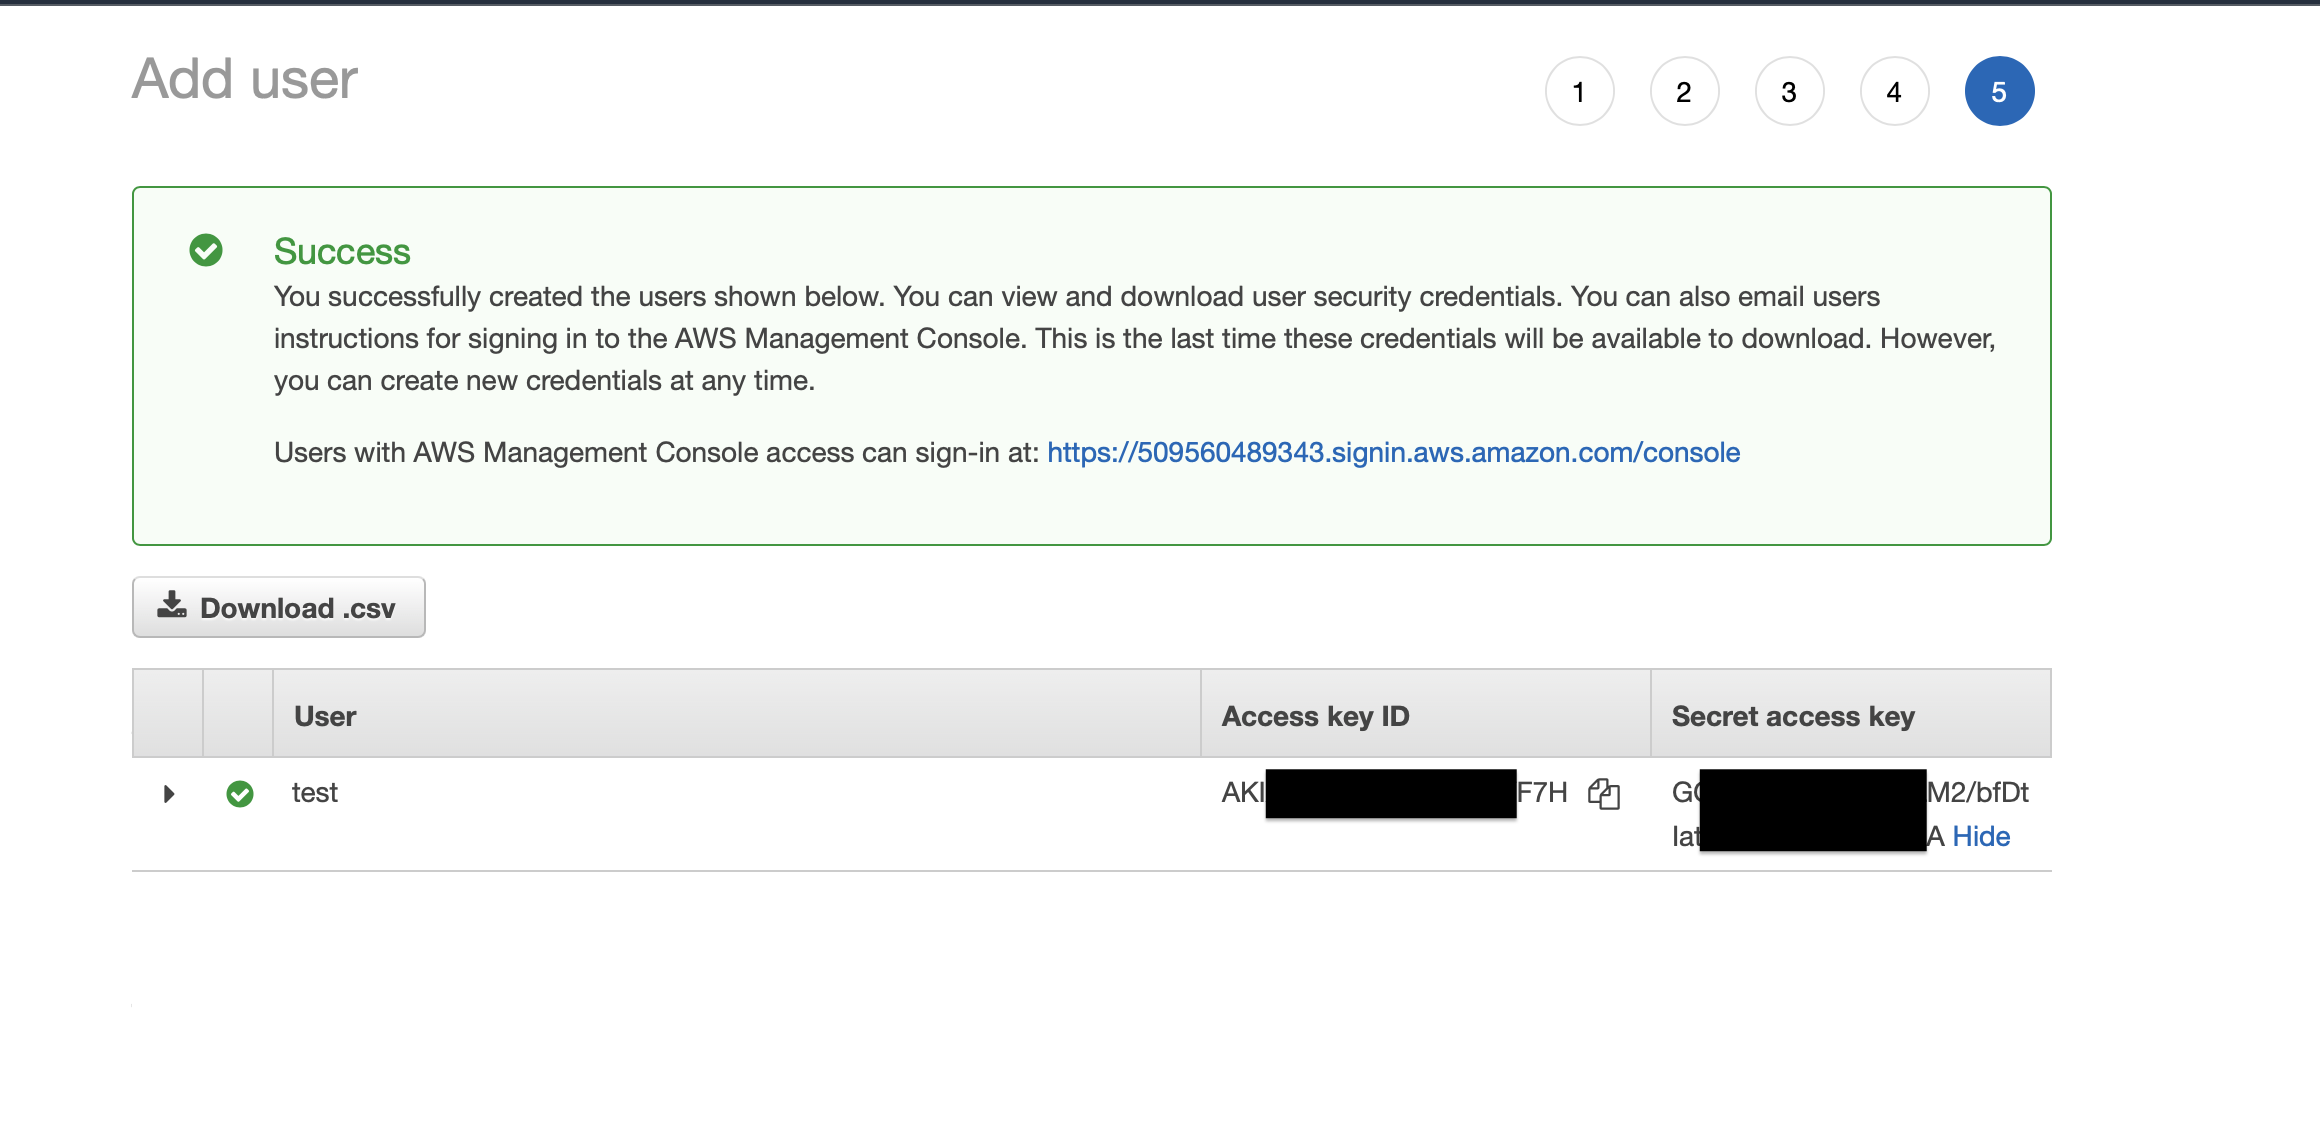
And you can save the key and secrets. Do not share this, and when saved, prefer an encrypted database like keepass for their management :
AWS CLI and Terraform installation
To install the AWS CLI and Terraform, I made a short bash script with all necessary commands :
#!/usr/bin/env bash

# Installing Terraform with Brew
brew tap hashicorp/tap
brew install hashicorp/tap/terraform
brew upgrade hashicorp/tap/terraform

# Downloading and Installing AWS CLI
wget https://awscli.amazonaws.com/AWSCLIV2.pkg
sudo installer -pkg AWSCLIV2.pkg -target /

# Enabling AWS CLI auto completion
awscomppath=$(which aws_completer)
complete -C $awscomppath aws

# Installing Terraform auto completion
terraform -install-autocomplete

# Check AWS CLI version
aws --version

# Check Terraform is well installed
terraform -help
The last step is to configure AWS CLI to the IAM access created before, so type the following and replace with your own informations :
aws configure
Terraform and AWS EC2 ELB and Auto Scaling
Files
I will now deploy, with Terraform, an infrastructure of 3 minimums and 5 maximum nodes using auto scaling, which will handle HTTP requests.
Nginx will be installed on each instances.
The folder contains the following files :
- main.tf
- output.tf
- terraform.tfstate
- variables.tf
- install_nginx.sh
All .tf files are used by Terraform, the bash script is used for EC2 instances within the field user-data.
Now, here is the main.tf :
terraform {
  required_providers {
    aws = {
      source  = "hashicorp/aws"
      version = "~> 3.27"
    }
  }
}

provider "aws" {
  profile = "default"
  region  = "ca-central-1"
}


data "aws_availability_zones" "available" {
   state = "available"
}

### Web Security Group
resource "aws_security_group" "ereborsg" {
  name = "web_sg"
  ingress {
    from_port = 80
    to_port = 80
    protocol = "tcp"
    cidr_blocks = ["0.0.0.0/0"]
  }

  ingress {
    from_port = 22
    to_port = 22
    protocol = "tcp"
    cidr_blocks = ["0.0.0.0/0"]
  }

  egress {
    from_port   = 0
    to_port     = 0
    protocol    = "-1"
    cidr_blocks = ["0.0.0.0/0"]
  }
}

# Instance web config
resource "aws_launch_configuration" "ereborweb" {
  image_id        = lookup(var.amis, var.region)
  instance_type   = "t2.micro"
  security_groups = ["${aws_security_group.ereborsg.id}"]
  key_name        = var.key_name
  user_data = "${file("install_nginx.sh")}"
  lifecycle {
    create_before_destroy = true
  }
}

# AutoScaling Group
resource "aws_autoscaling_group" "ereboras" {
  launch_configuration = aws_launch_configuration.ereborweb.id
  #availability_zones   = "ca-central-1a"
  availability_zones = data.aws_availability_zones.available.names
  min_size             = 3
  max_size             = 5
  load_balancers       = ["${aws_elb.ereborlb.name}"]
  health_check_type    = "ELB"
  tag {
    key                 = "Name"
    value               = "erebor"
    propagate_at_launch = true
  }
}

# ELB configuration
resource "aws_elb" "ereborlb" {
  name               = "erebor"
  security_groups = ["${aws_security_group.ereborsg.id}"]
  availability_zones = data.aws_availability_zones.available.names
#  availability_zones = ["${data.aws_availability_zones.all.names}"]
  health_check {
    healthy_threshold   = 2
    unhealthy_threshold = 2
    timeout             = 3
    interval            = 30
    target              = "HTTP:80/"
  }
  listener {
    lb_port           = 80
    lb_protocol       = "http"
    instance_port     = "80"
    instance_protocol = "http"
  }
}
As you can see, I create an auto scaling group of 3 minimums instances, which can grow up to 5 instances. The instances are t2.micro type. The load balancer is checking on HTTP, port 80.
One important thing : I had created an egress with full access for the security group. If you don’t do that, or, if you don’t allow the traffic needed for package installation, your Nginx services will never be installed. As the egress traffic is less a security problem, I choosed to open it all.
Now, the variables.tf file :
variable "ec2count" {
  default = 1
}

variable "region" {
  description = "AWS Region used for instances deployment"
  default     = "ca-central-1"
}

variable "amis" {
  description = "AWS EC2 AMIs used"
  default     = { ca-central-1 = "ami-043e33039f1a50a56" }
}

variable "public_key_path" {
  description = "Path of AWS Public keys folder"
  default     = "/Users/guillaumemancini/Documents/IT/Projets/Cloud/AWS/MBP-Erebor.pem"
}

variable "key_name" {
  description = "Key to use for EC2 instances"
  default     = "MBP-Erebor"
}
This file contains the AMI I will use, which is an Ubuntu 20.04 available in the ca-central-1 region. It also contains the path to my public key to connect to EC2 with SSH, but I will come back to this later.
And, finally, the install_nginx.sh file :
#!/usr/bin/env bash
sudo apt-get update
sudo apt-get install -y nginx
sudo systemctl start nginx
sudo systemctl enable nginx
echo "<h1>Deployed with Terraform with love</h1>" | sudo tee /var/www/html/index.html
This script install and enable nginx. I also add a simple line of html to get a custom index.html. But, this will be overrided later.
Deployment
Now, the magic part.
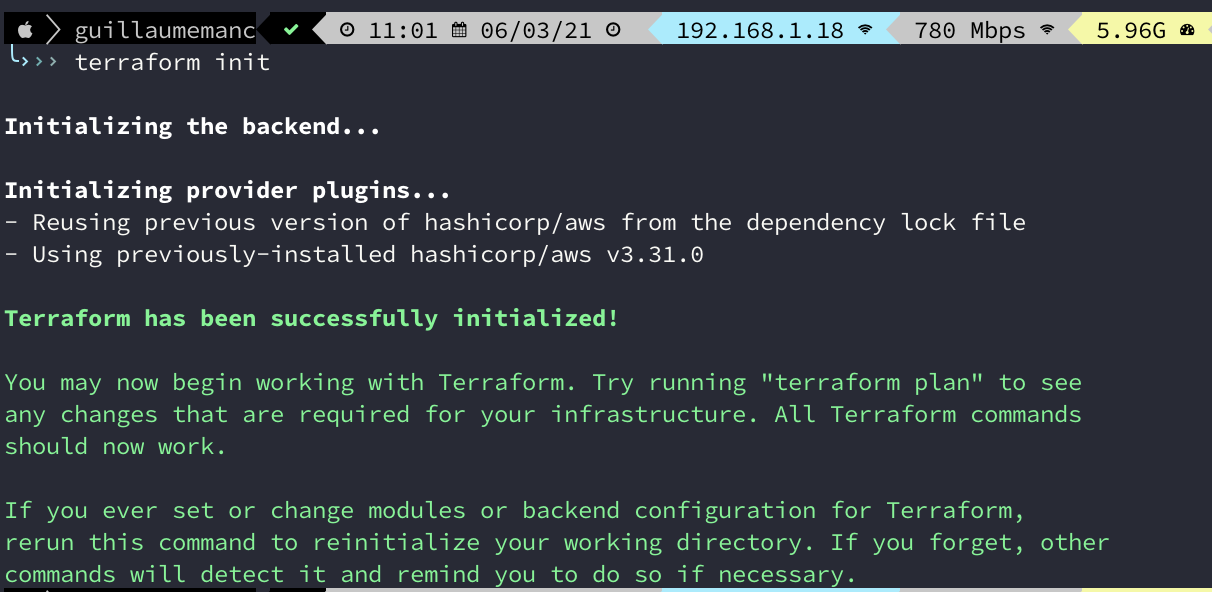
You need to init Terraform, then you will plan and apply :
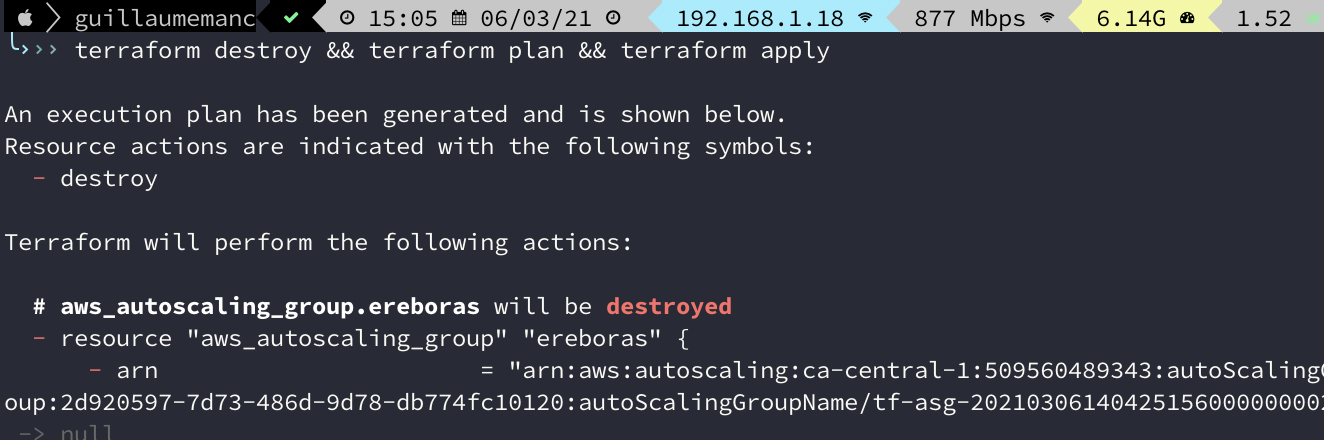
Note : in the last one, I already had a deployment, and for the purpose of the demo, I will destroy before launching plan and apply. And I chains the three commands, but nothing new for a linux user.
And the infrastructure is now deployed :

If you copy/paste the url displayed on the field elb_dns_name in a web broswer, you’ll get your web page.
4 ressources are created :
security group
auto scaling group
auto launch configuration
load balancer
And if we go to our AWS console, there are 3 EC2 t2.micro instances running :

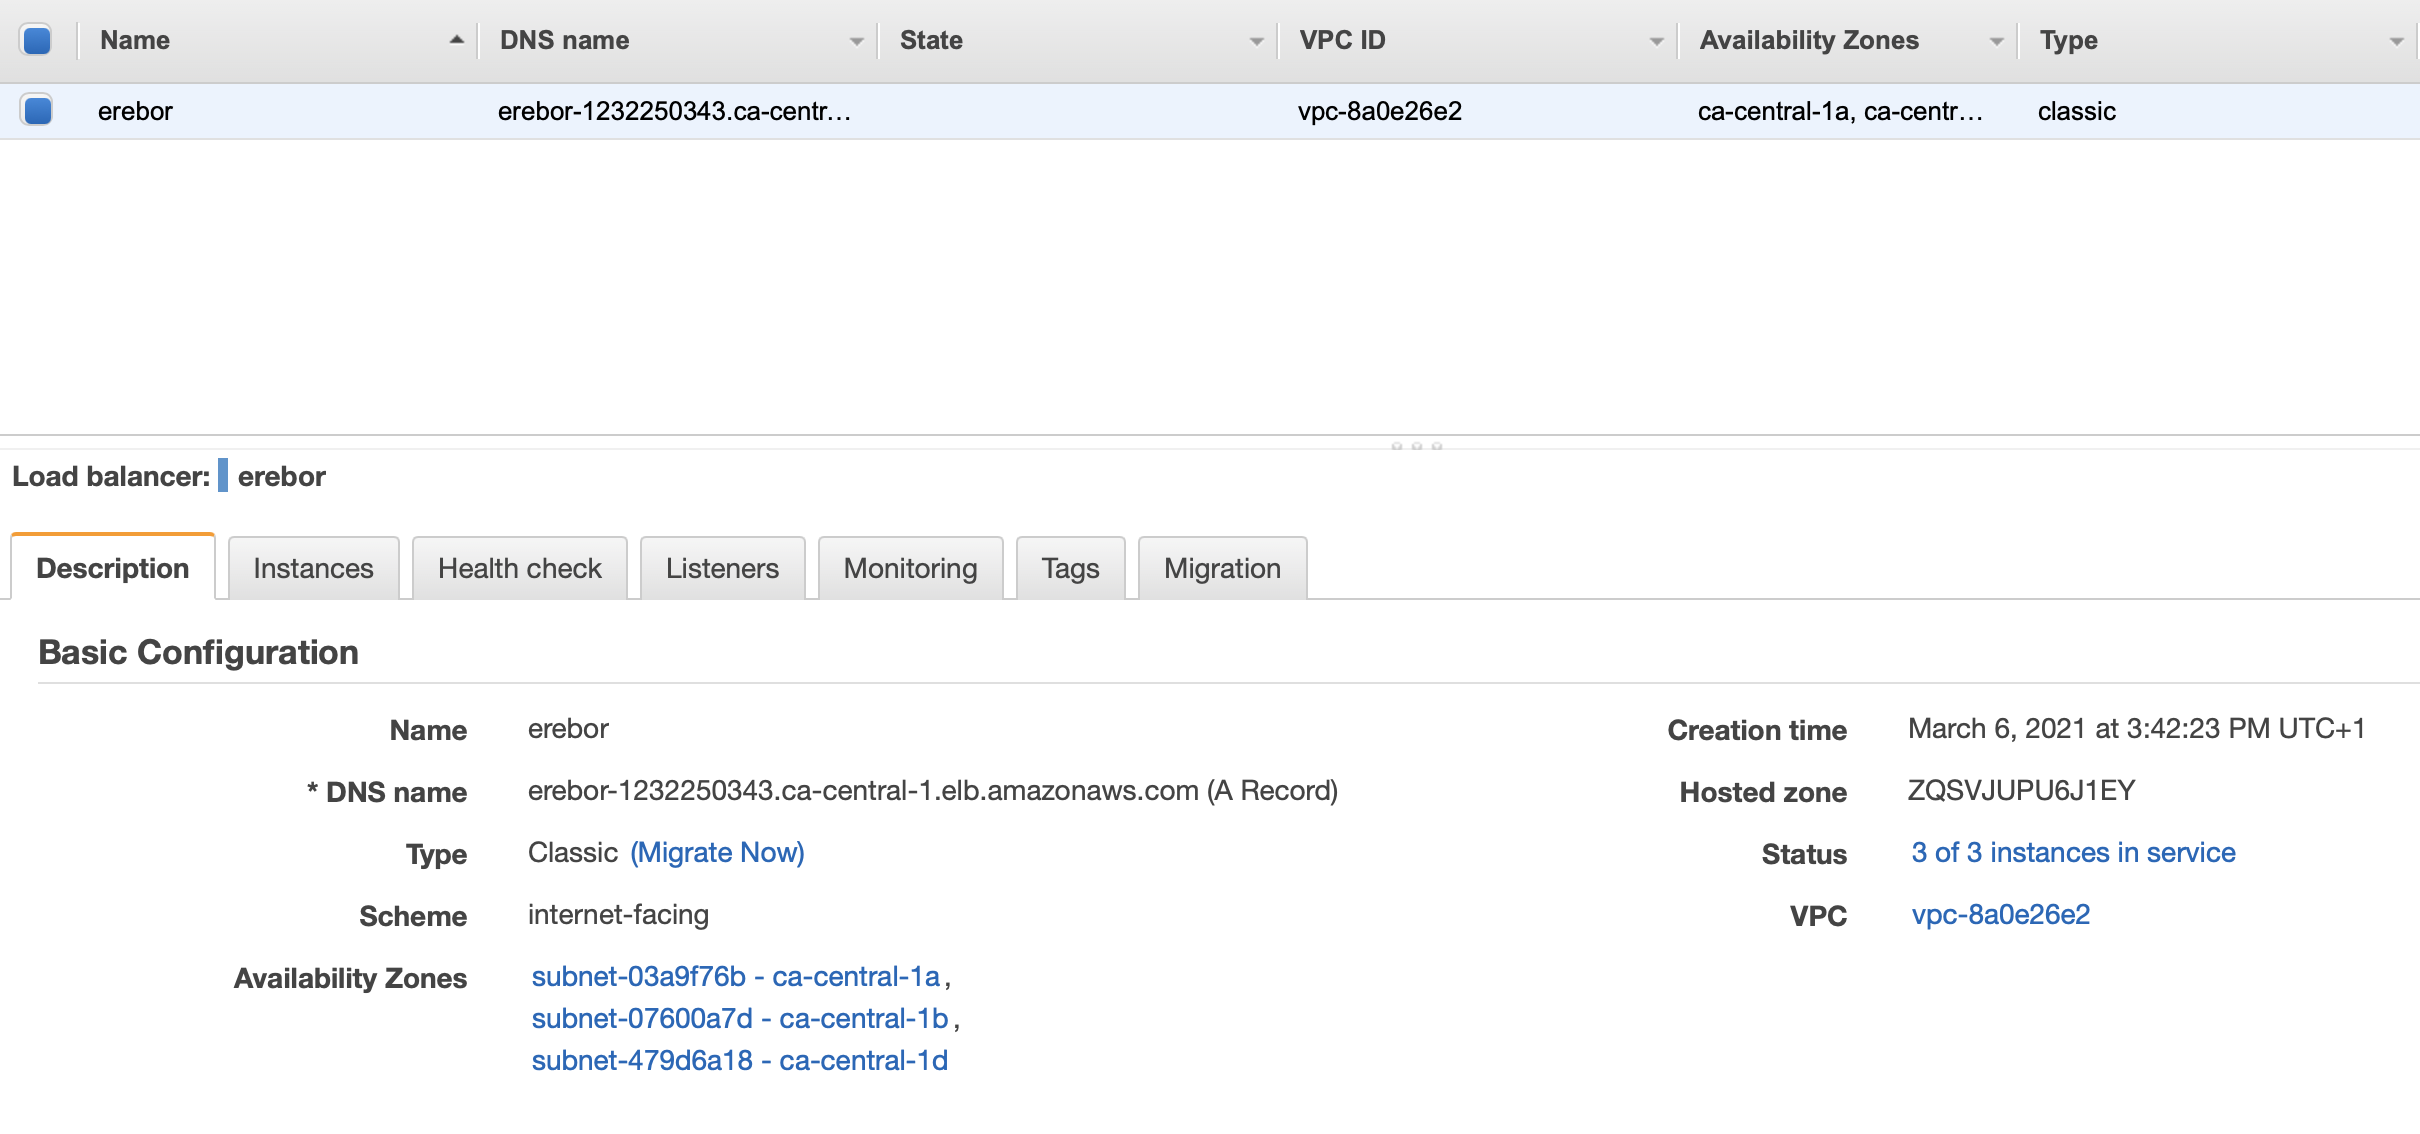
As well, the Load balancer is created :
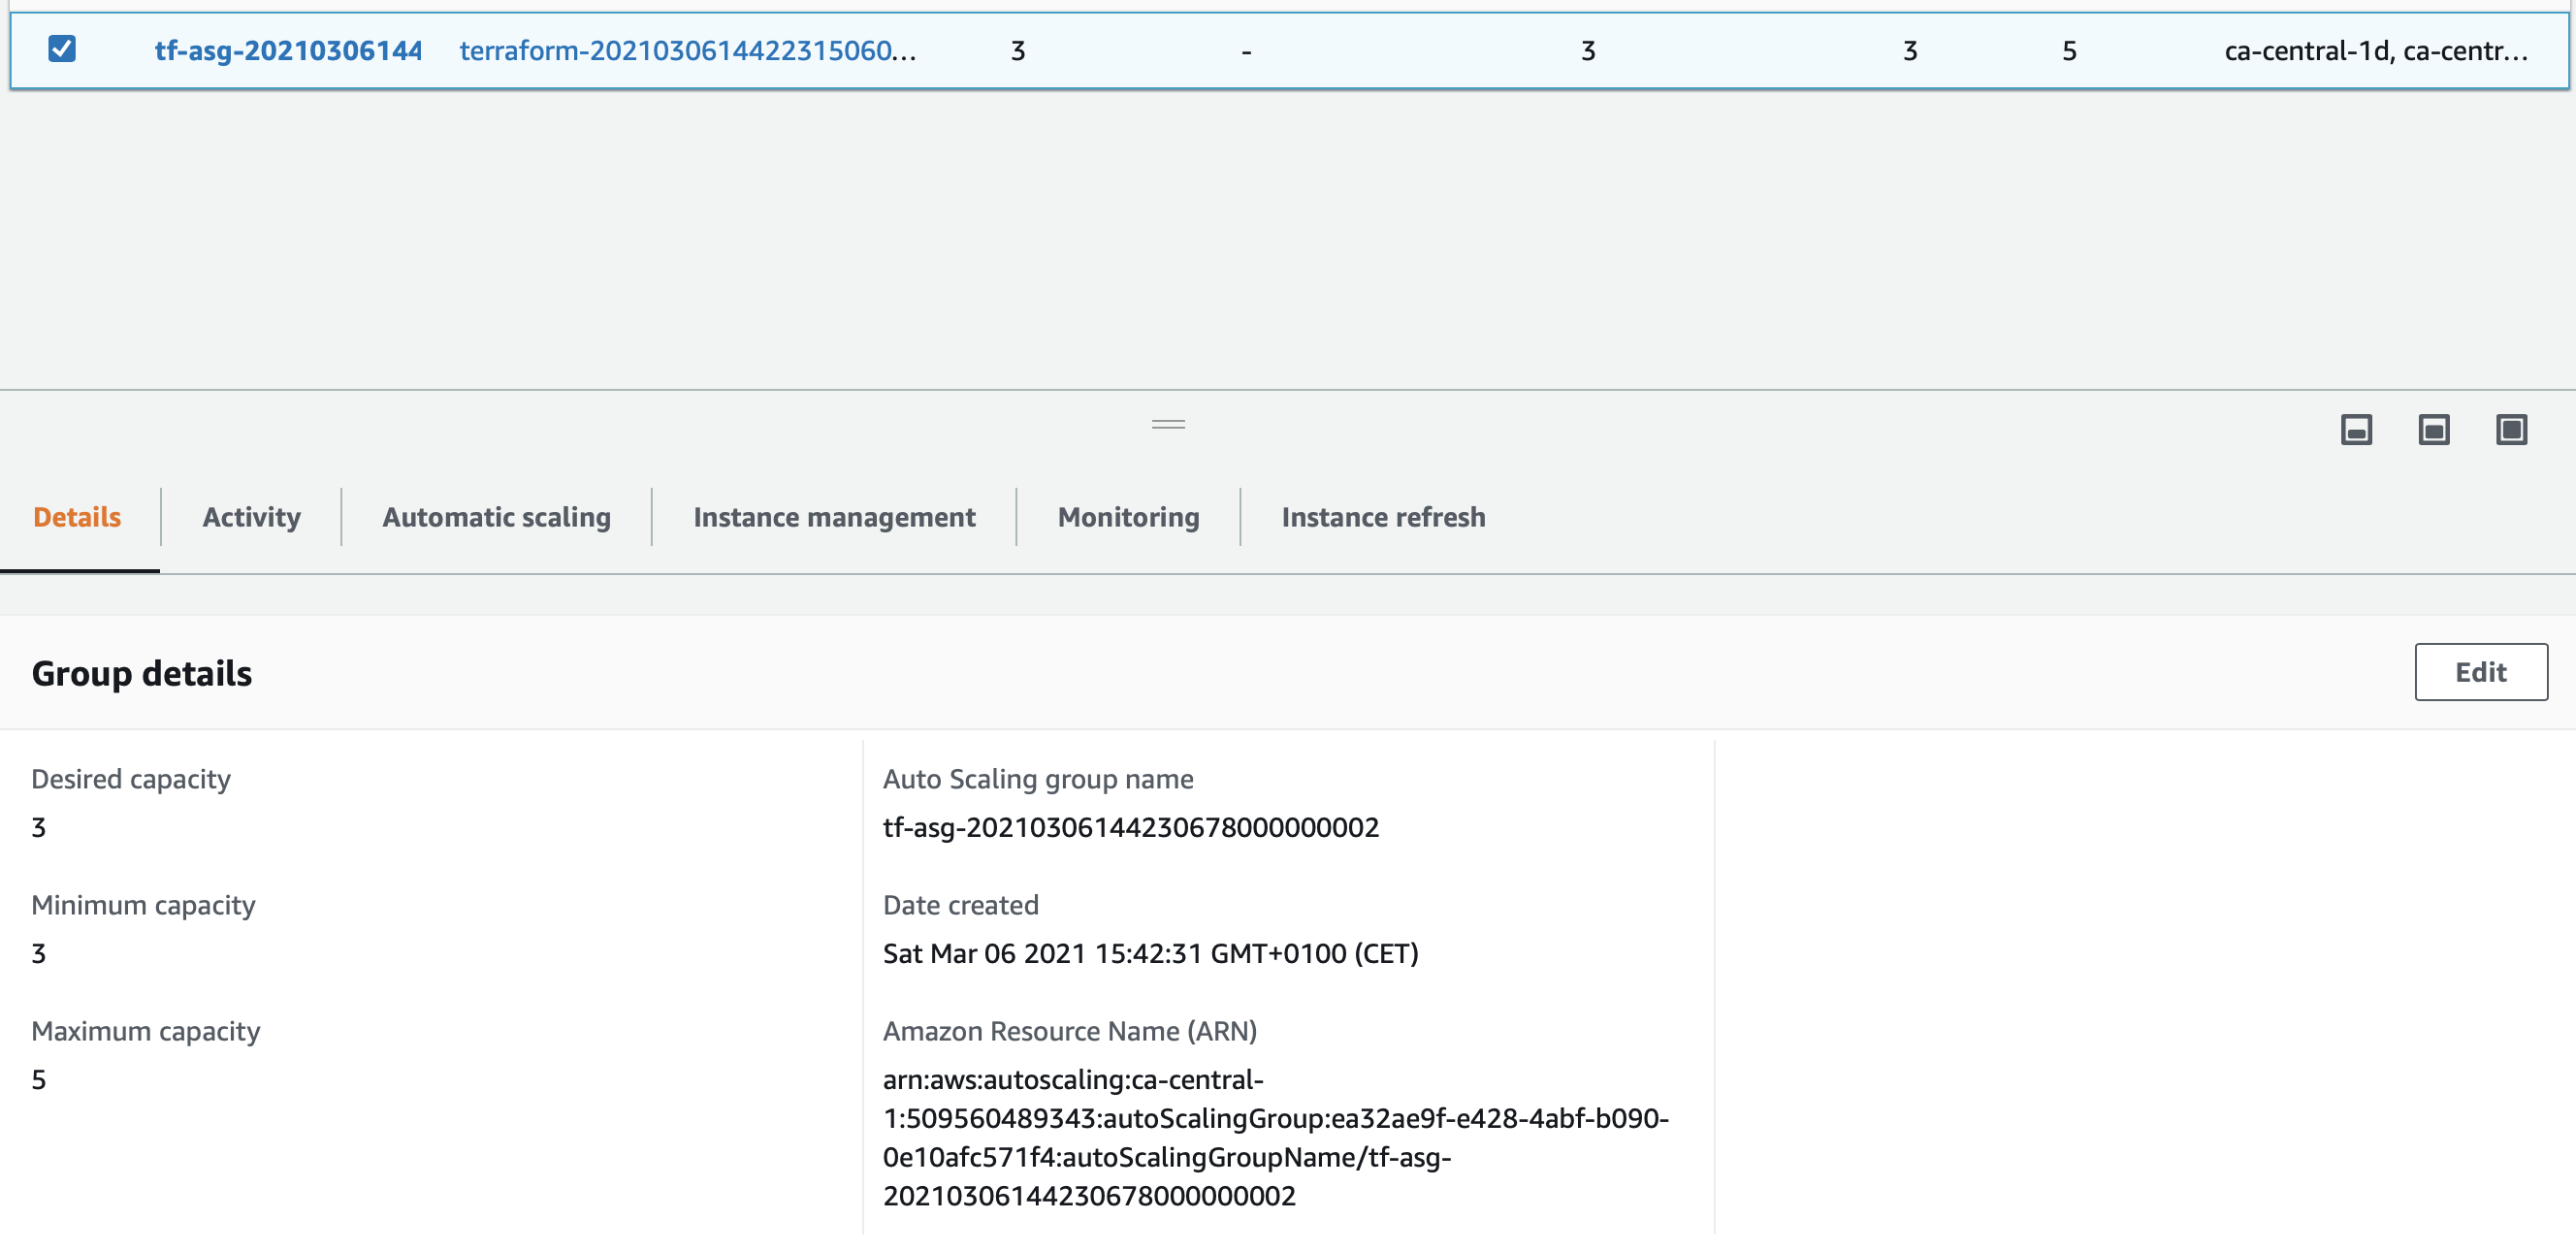
And so is the autoscaling group :
And now what?
Ansible
Ansible is one of the best automation tool in my opinion. I use it every time I have some repeating tasks, like deploying package on servers, new configurations file, updating… etc
Ansible is composed by mandatories files :
inventory, which is my hosts file composed of nodes
playbook, which are a simple or a list of action to run against nodes
In a production environment, I would use vault for passwords management. This is a lab, and my servers does not accept ssh auth by password, only by key, so this is not a big issue there.
Building inventory
First thing, I get the ip of my 3 AWS EC2 nodes, using the AWS CLI :

So, I can build my inventory like that :
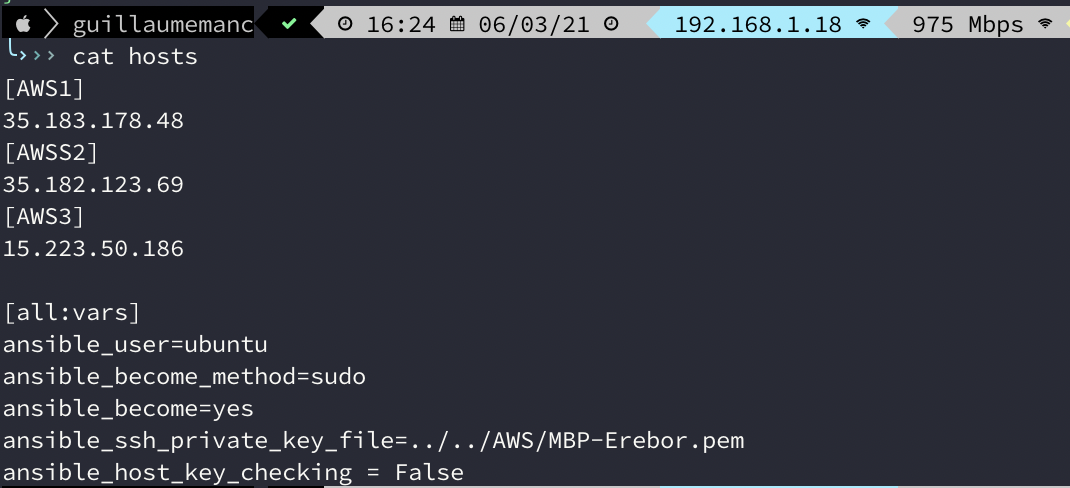
In a production environment, we would have divide, maybe with webservers, databases, and so on, where I have divided by AWS1-3.
We will check that the communication is working well, with the ansible command and ping module :

Fine, everything is ok, let’s go on.
Playbook
Playbooks could be compared to a cook book : you create a list of tasks, run one after the other. One great thing with Ansible, is that, if the node already meet the task you need to execute, it will goes to the next task, and let you save a lot of time.
Here is my playbook, really simple and maybe not optimized :
---
- hosts: all
  gather_facts: no
  tasks :
   - name: copying my amazing website1
     copy:
       src: ind1/index.html
       dest: /var/www/html/index.html
     when: "'AWS1' in inventory_hostname"
   - name: copying my amazing website2
     copy:
       src: ind2/index.html
       dest: /var/www/html/index.html
     when: "'AWS2' in inventory_hostname"
   - name: copying my amazing website3
     copy:
       src: ind3/index.html
       dest: /var/www/html/index.html
     when: "'AWS3' in inventory_hostname"
In my current directory, I have 3 folders, ind1, ind2, and ind3. Each one contains an index.html file, with some differencies, in relation with their destinations. So, for the instance 1, we’ll copy the index.html from the ind1 folder, and so on.
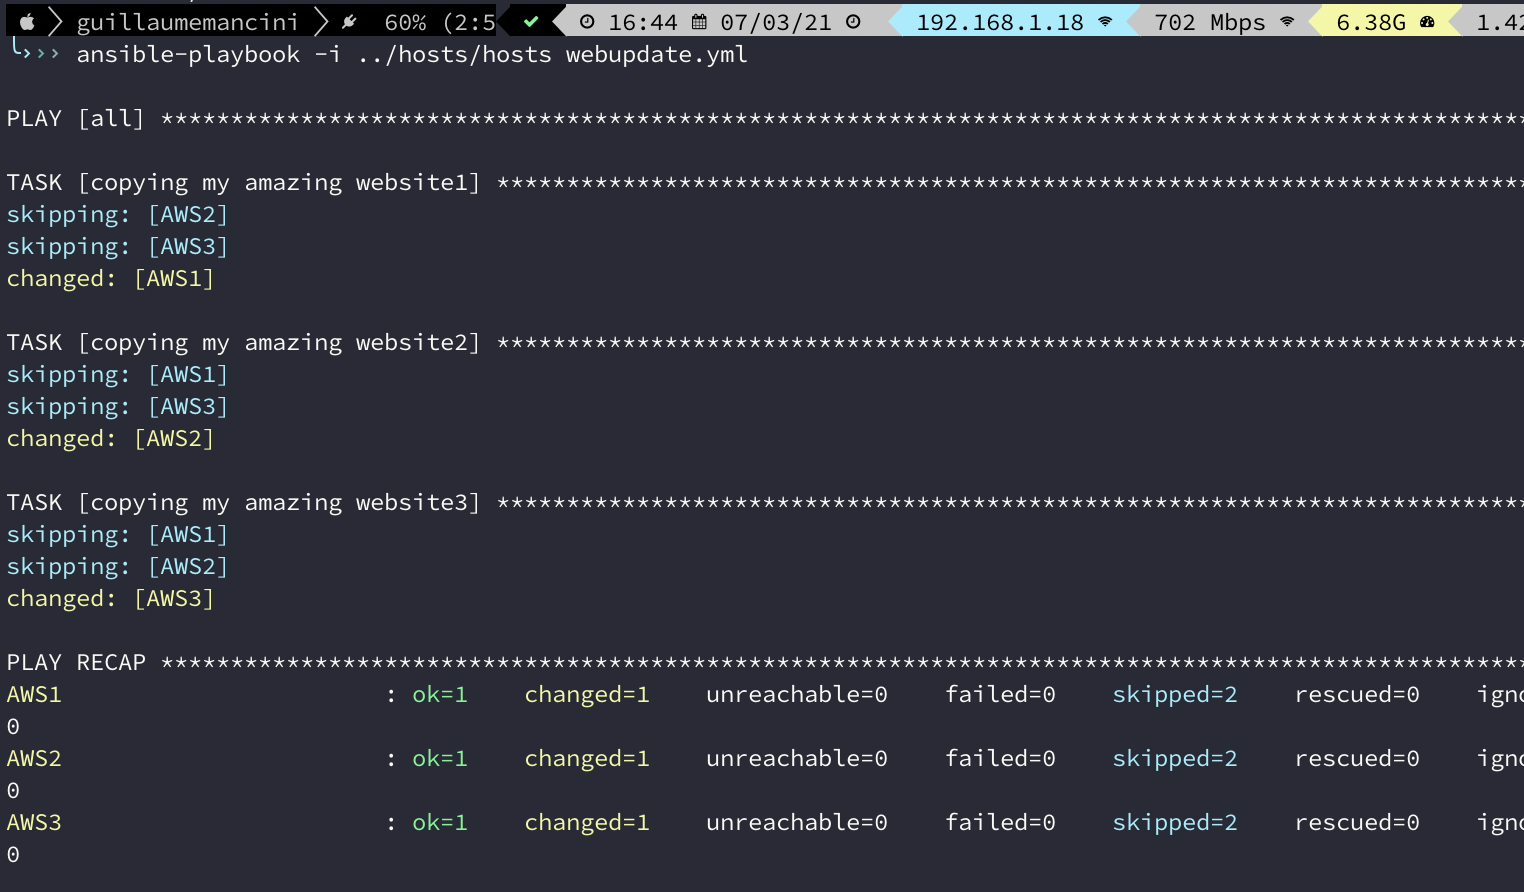
We run the playbook to copy the files :
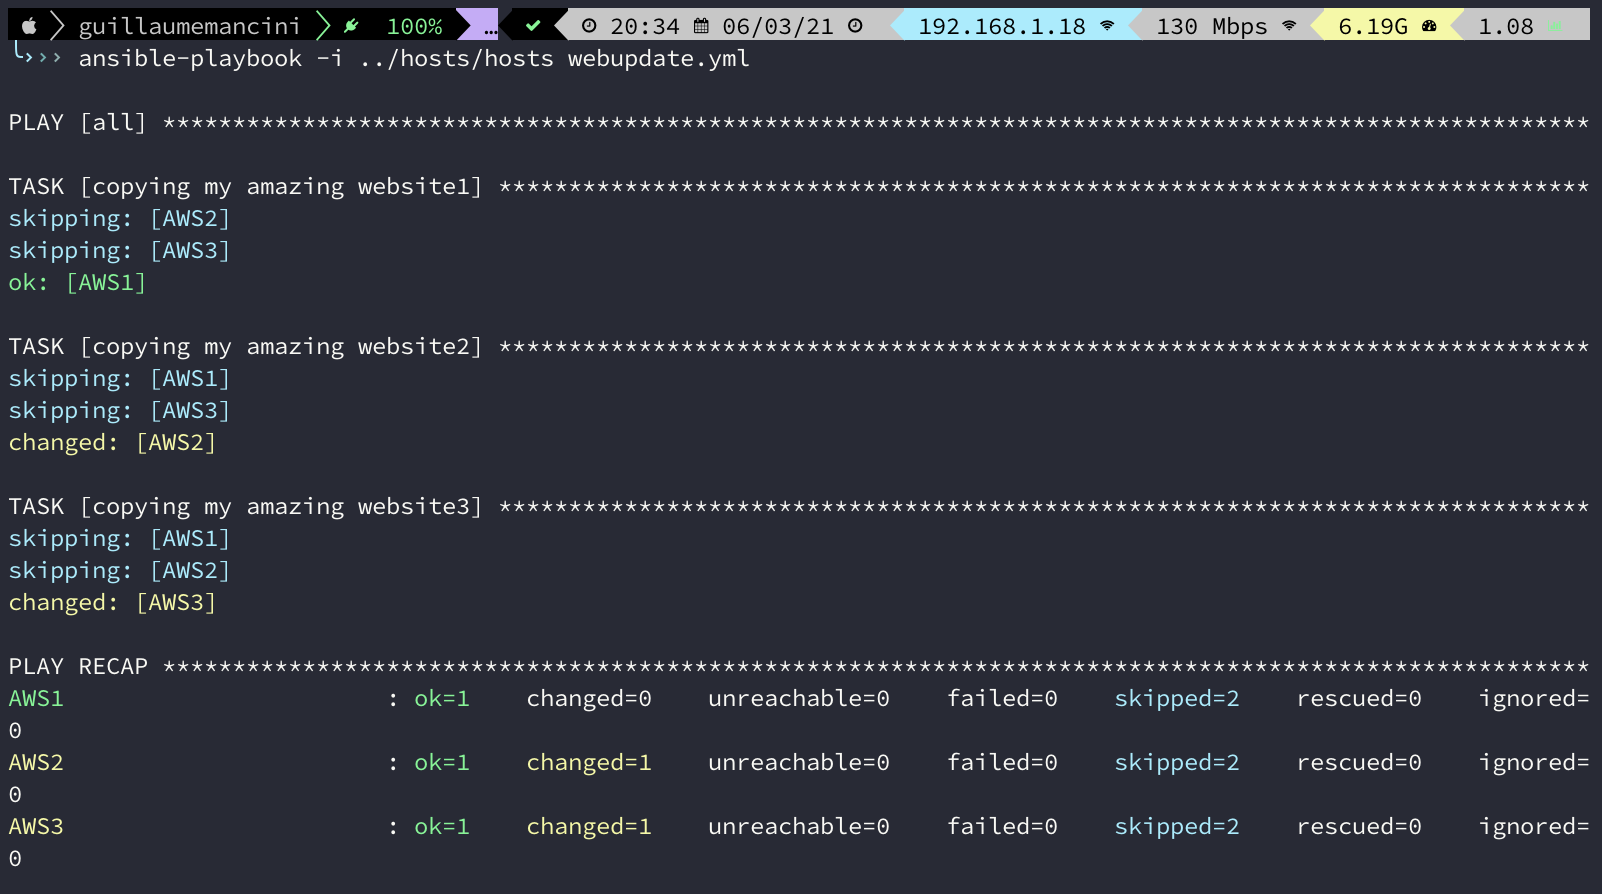
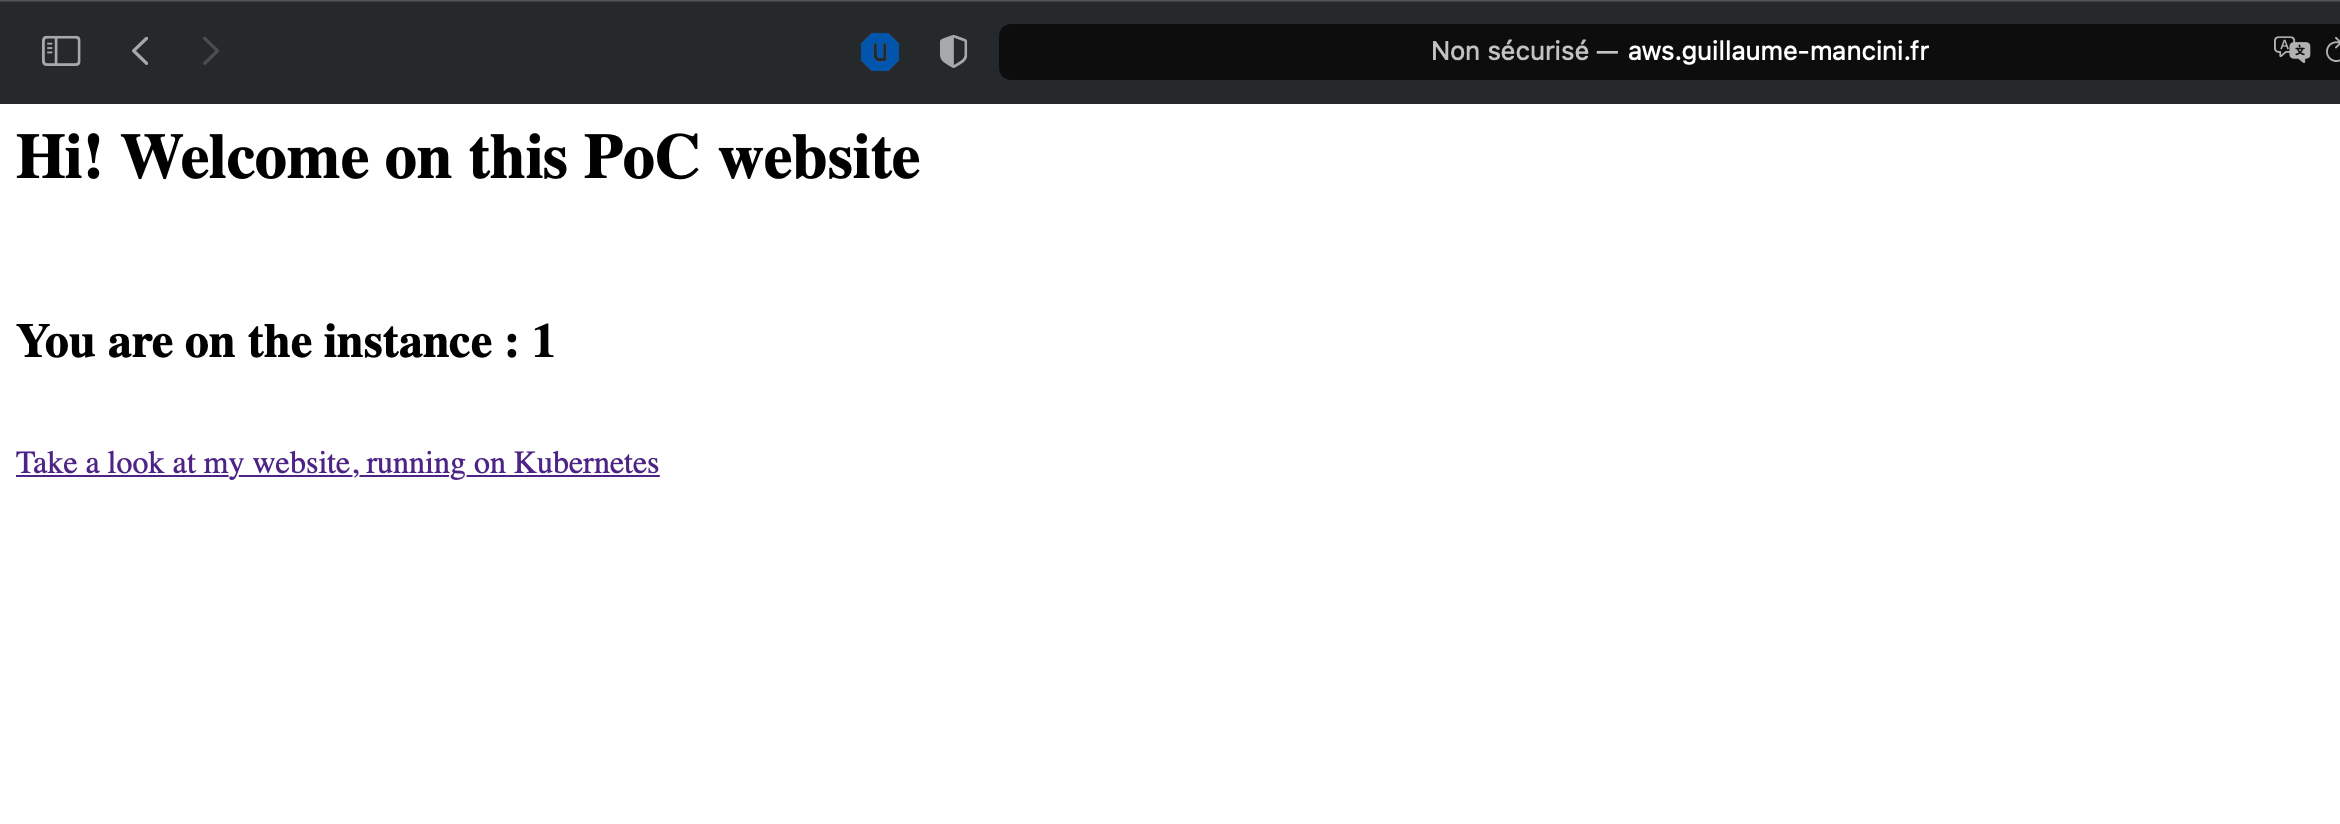
And now, if we use the url we got at first step with Terraform. The url is always the same endpoint, we only refresh the page :
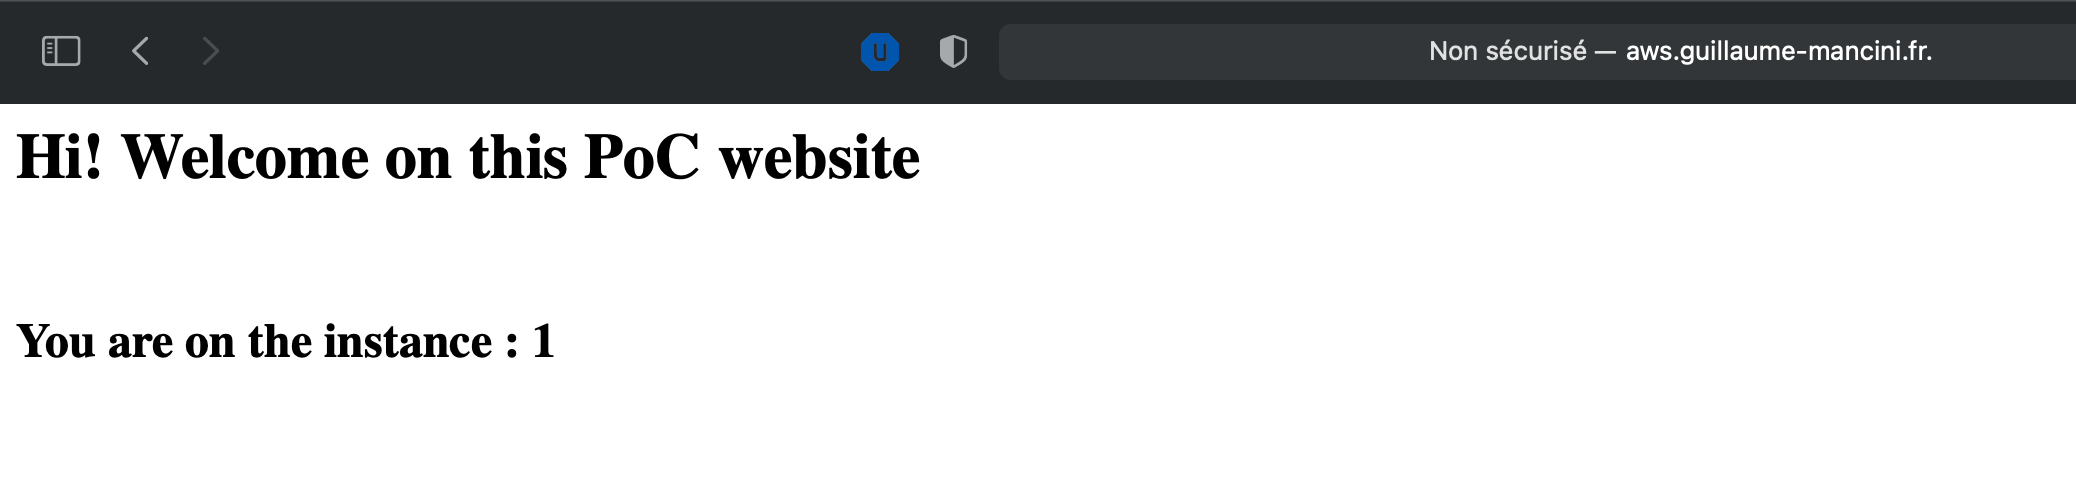
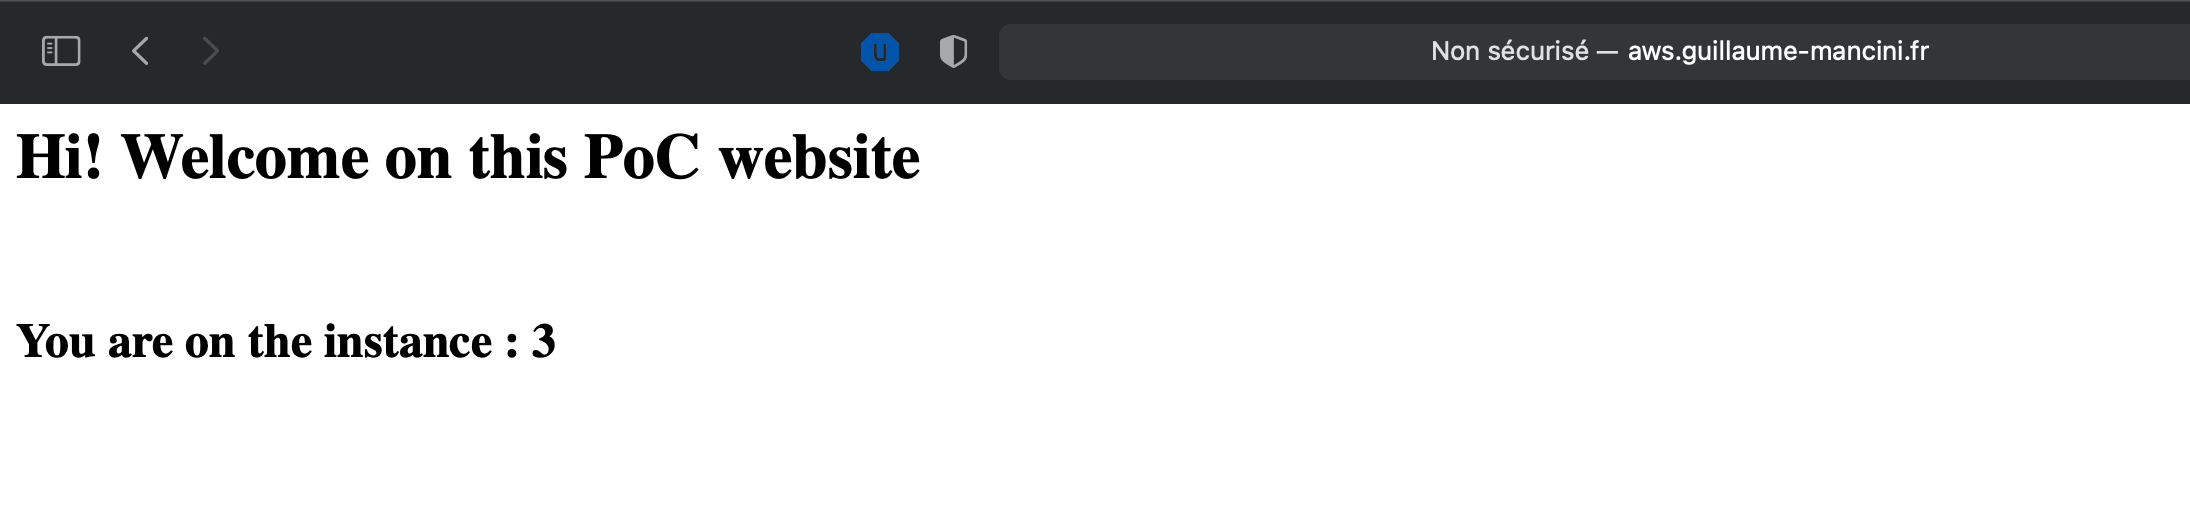
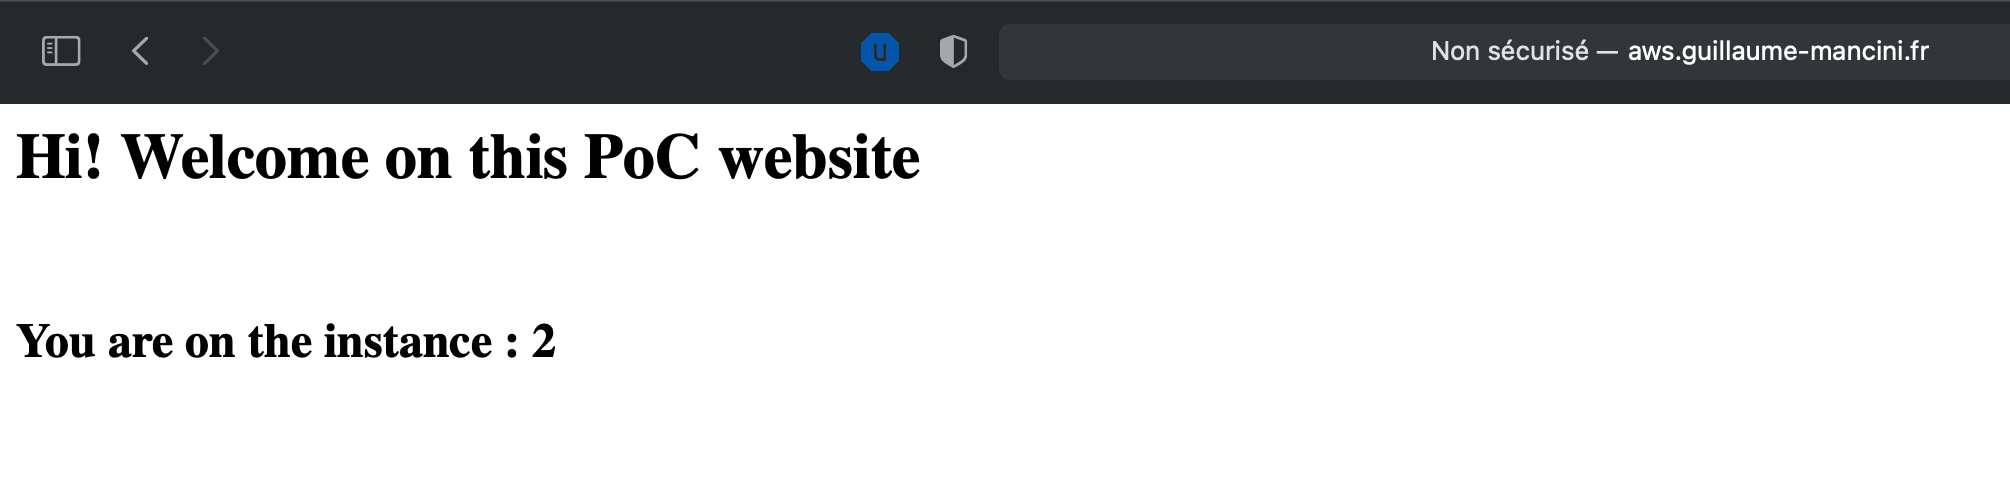
As you can see, the URL is always the same, http://aws.guillaume-mancini.fr , but each time we got another number, showing that we are not always on the same server. We could have enable stickiness to always stay on the same server, but it is not the goal there.
Note : no dark magic for the url hostname, only a cname in my dns zone, pointing to the ELB dns entry.
Rancher and Kubernetes
For this part, I am pretty new as I do not know Kubernetes nor Rancher. This is the exact goal of this part, discover Kurbenetes, and more specifically RKE (Rancher Kubernetes Engine).
Deployment on AWS
So, I will use Terraform for this. First of all, as mentionned in the official rancher documentation, use git to clone the official repository :
git clone https://github.com/rancher/quickstart

cd quickstart/aws
I only will custom the terraform.tfvars file before deploying :
# AWS Access Key
aws_access_key = "key"

# AWS Secret Key
aws_secret_key = "secret"

# Password used to log in to the admin account on the new Rancher server
rancher_server_admin_password = "password"


# Optional variables, uncomment to customize the quickstart
# ----------------------------------------------------------

# AWS region for all resources
aws_region = "ca-central-1"

# Prefix for all resources created by quickstart
# prefix = ""

# EC2 instance size of all created instances
instance_type = "t2.medium"

# Docker version installed on target hosts
# - Must be a version supported by the Rancher install scripts
# docker_version = ""

# Kubernetes version used for creating management server cluster
# - Must be supported by RKE terraform provider 1.0.1
# rke_kubernetes_version = ""

# Kubernetes version used for creating workload cluster
# - Must be supported by RKE terraform provider 1.0.1
# workload_kubernetes_version = ""

# Version of cert-manager to install, used in case of older Rancher versions
# cert_manager_version = ""

# Version of Rancher to install
# rancher_version = ""
I will custom this fields :
aws_access_key with my own key. I had created another IAM access for this case.
aws_secret_key
rancher_server_admin_password, wich will be used to log into rancher webui
aws_region, I choosed the region of Canada
instance_type, I choosed t2.medium, which is not a free tier instance, but which is the minimal type in order to have a running environment.
And here we go, init then apply :
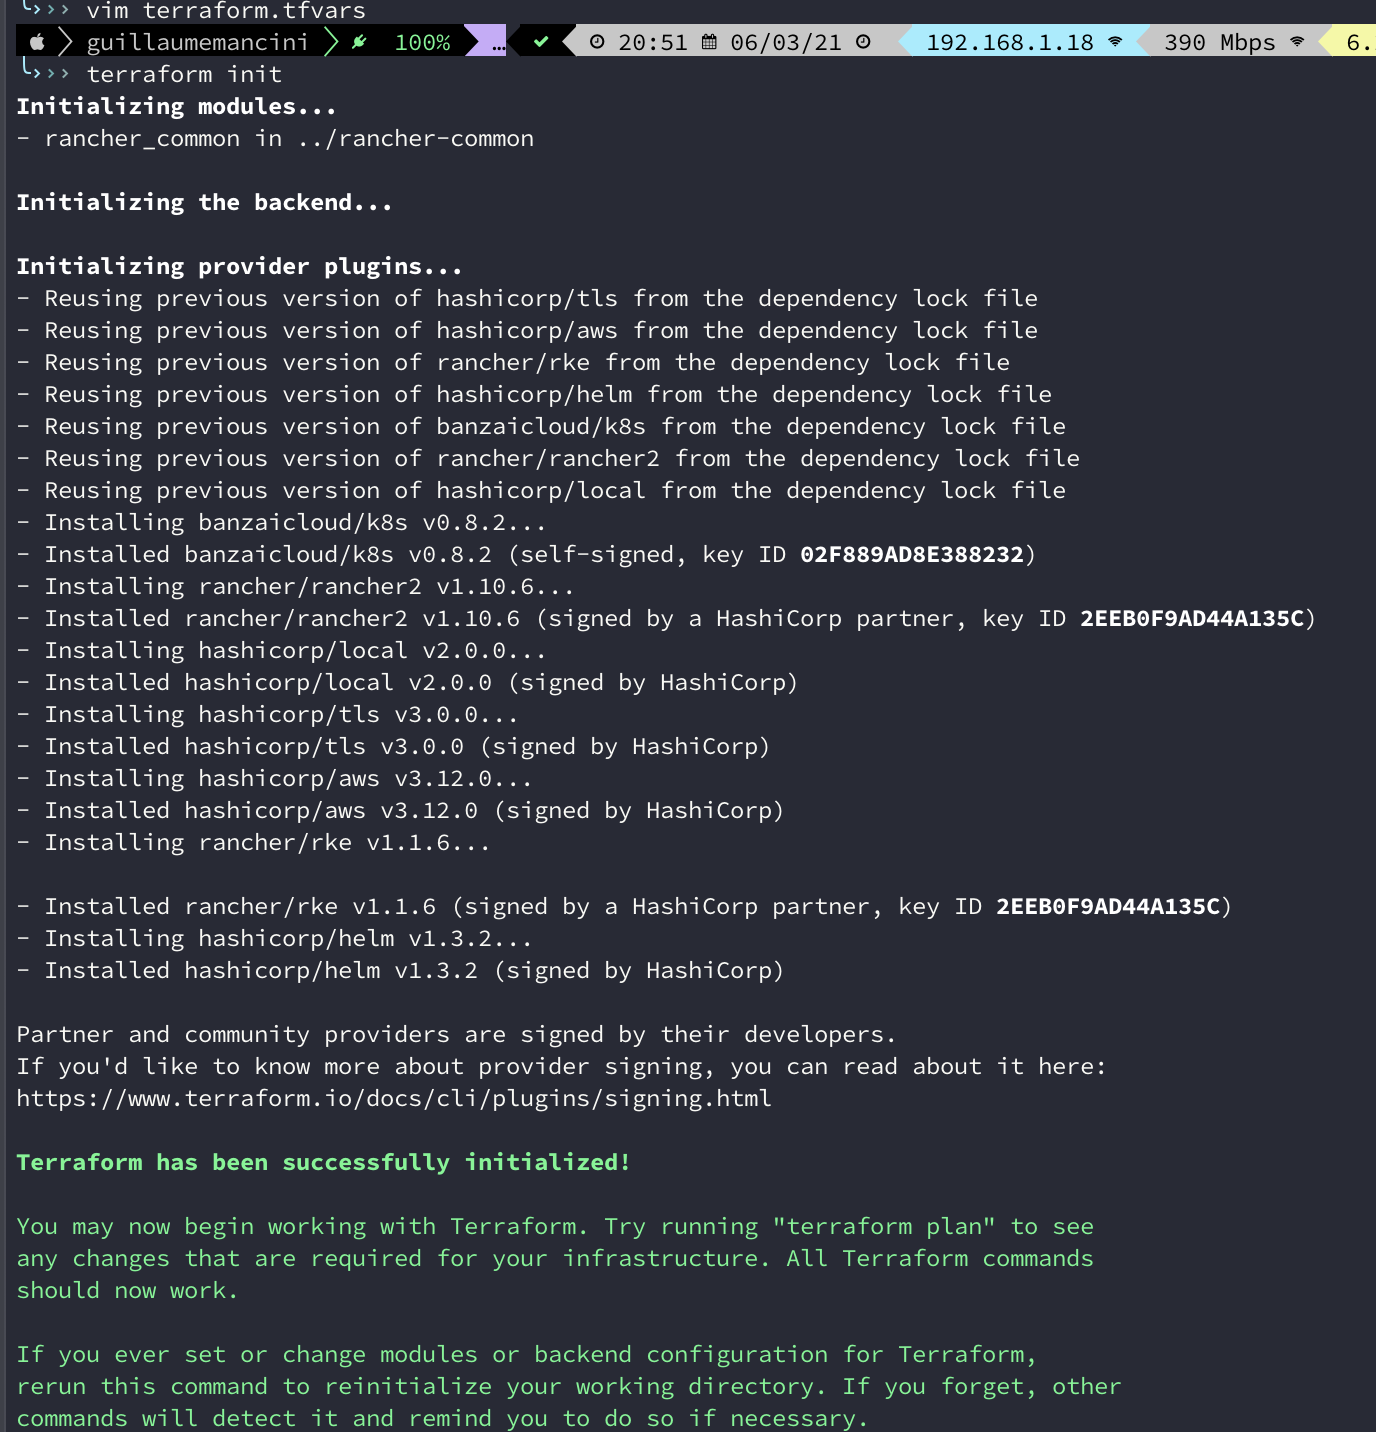
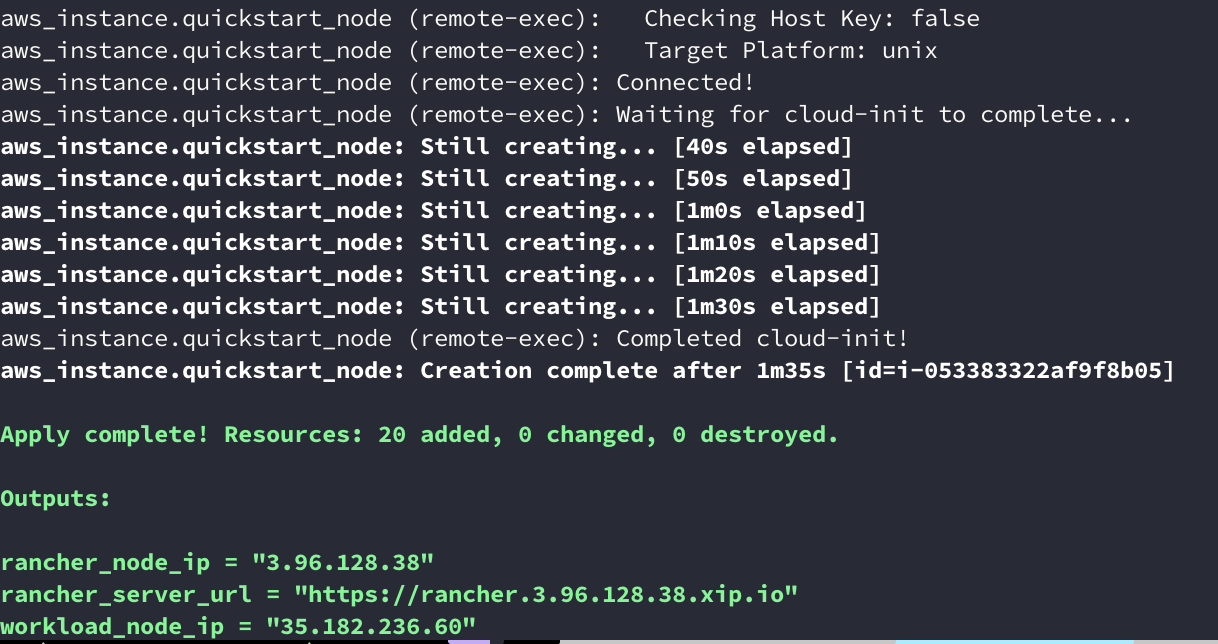
You can copy the rancher_server_url and paste into a web browser, and there, you will be able to login.

The default user is admin, the password is the one set in our terraform.tvars file.
And there we are :
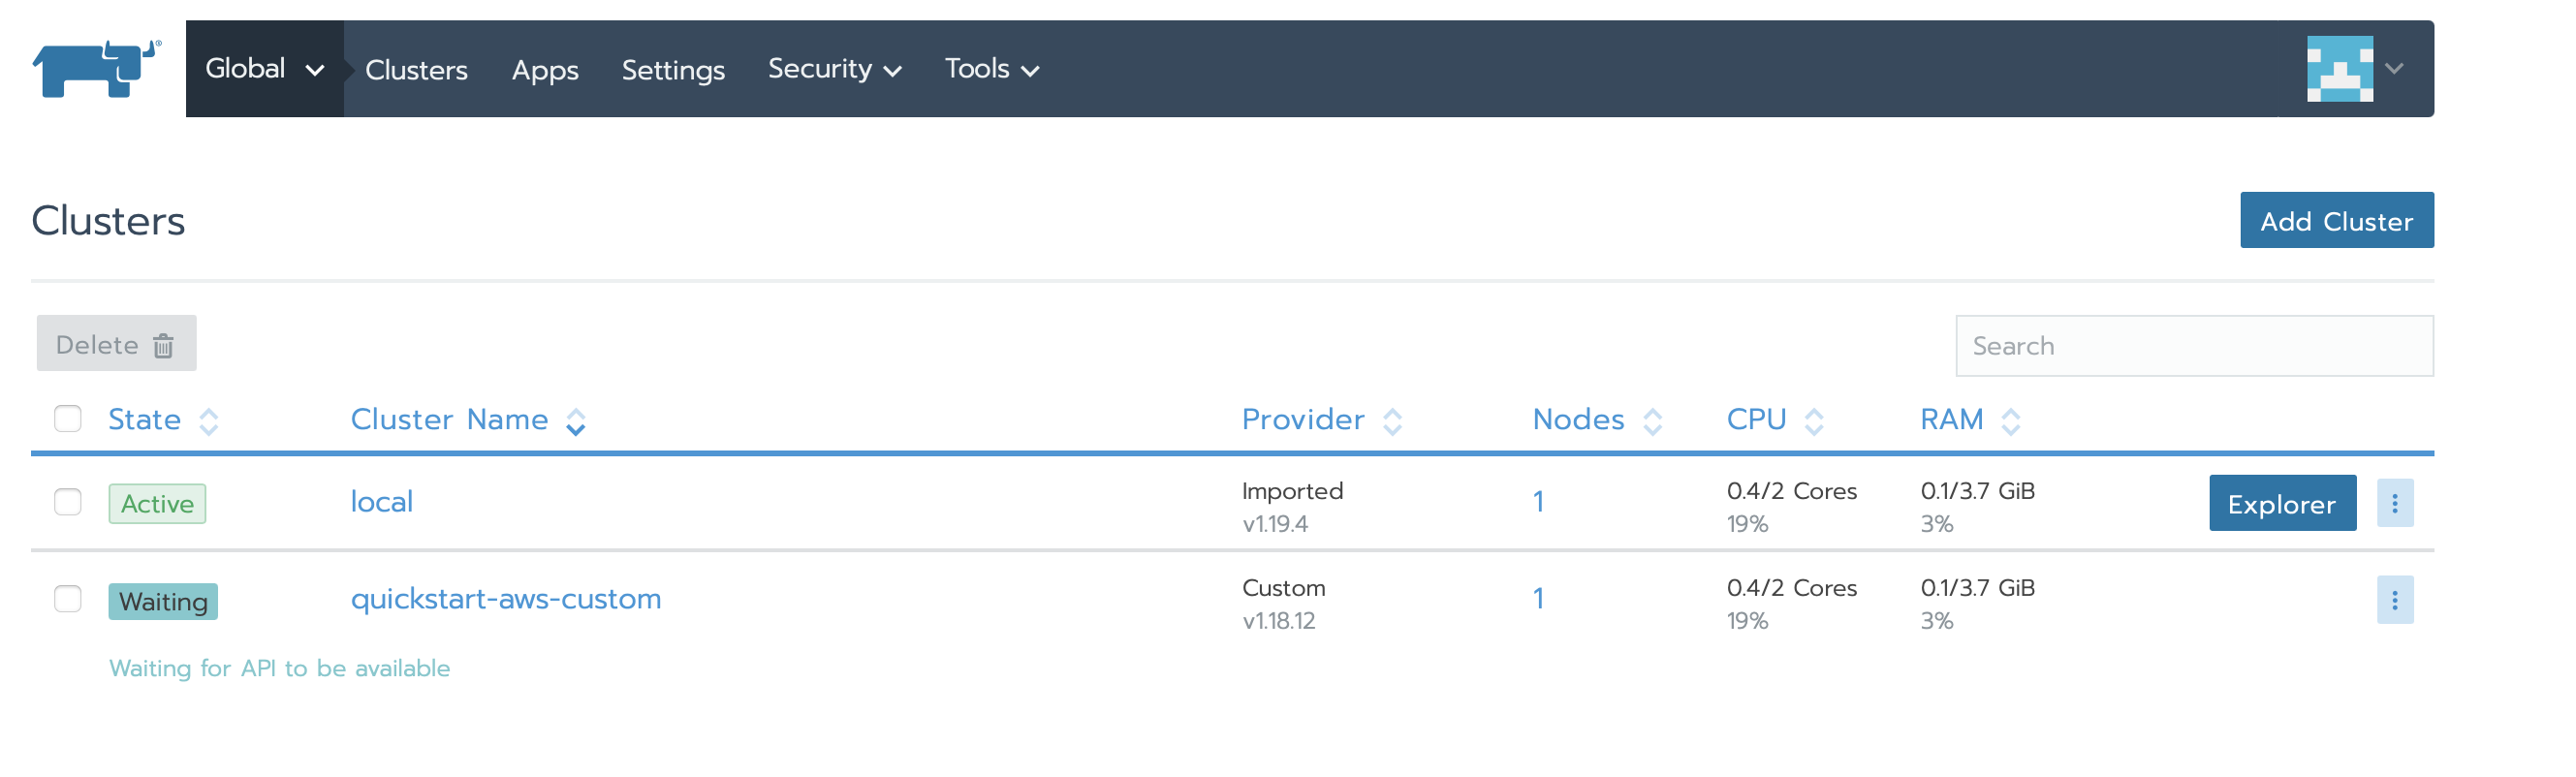
Be patient, the kubernetes node is deploying, and it can take more or less time depending on the AWS instance type.
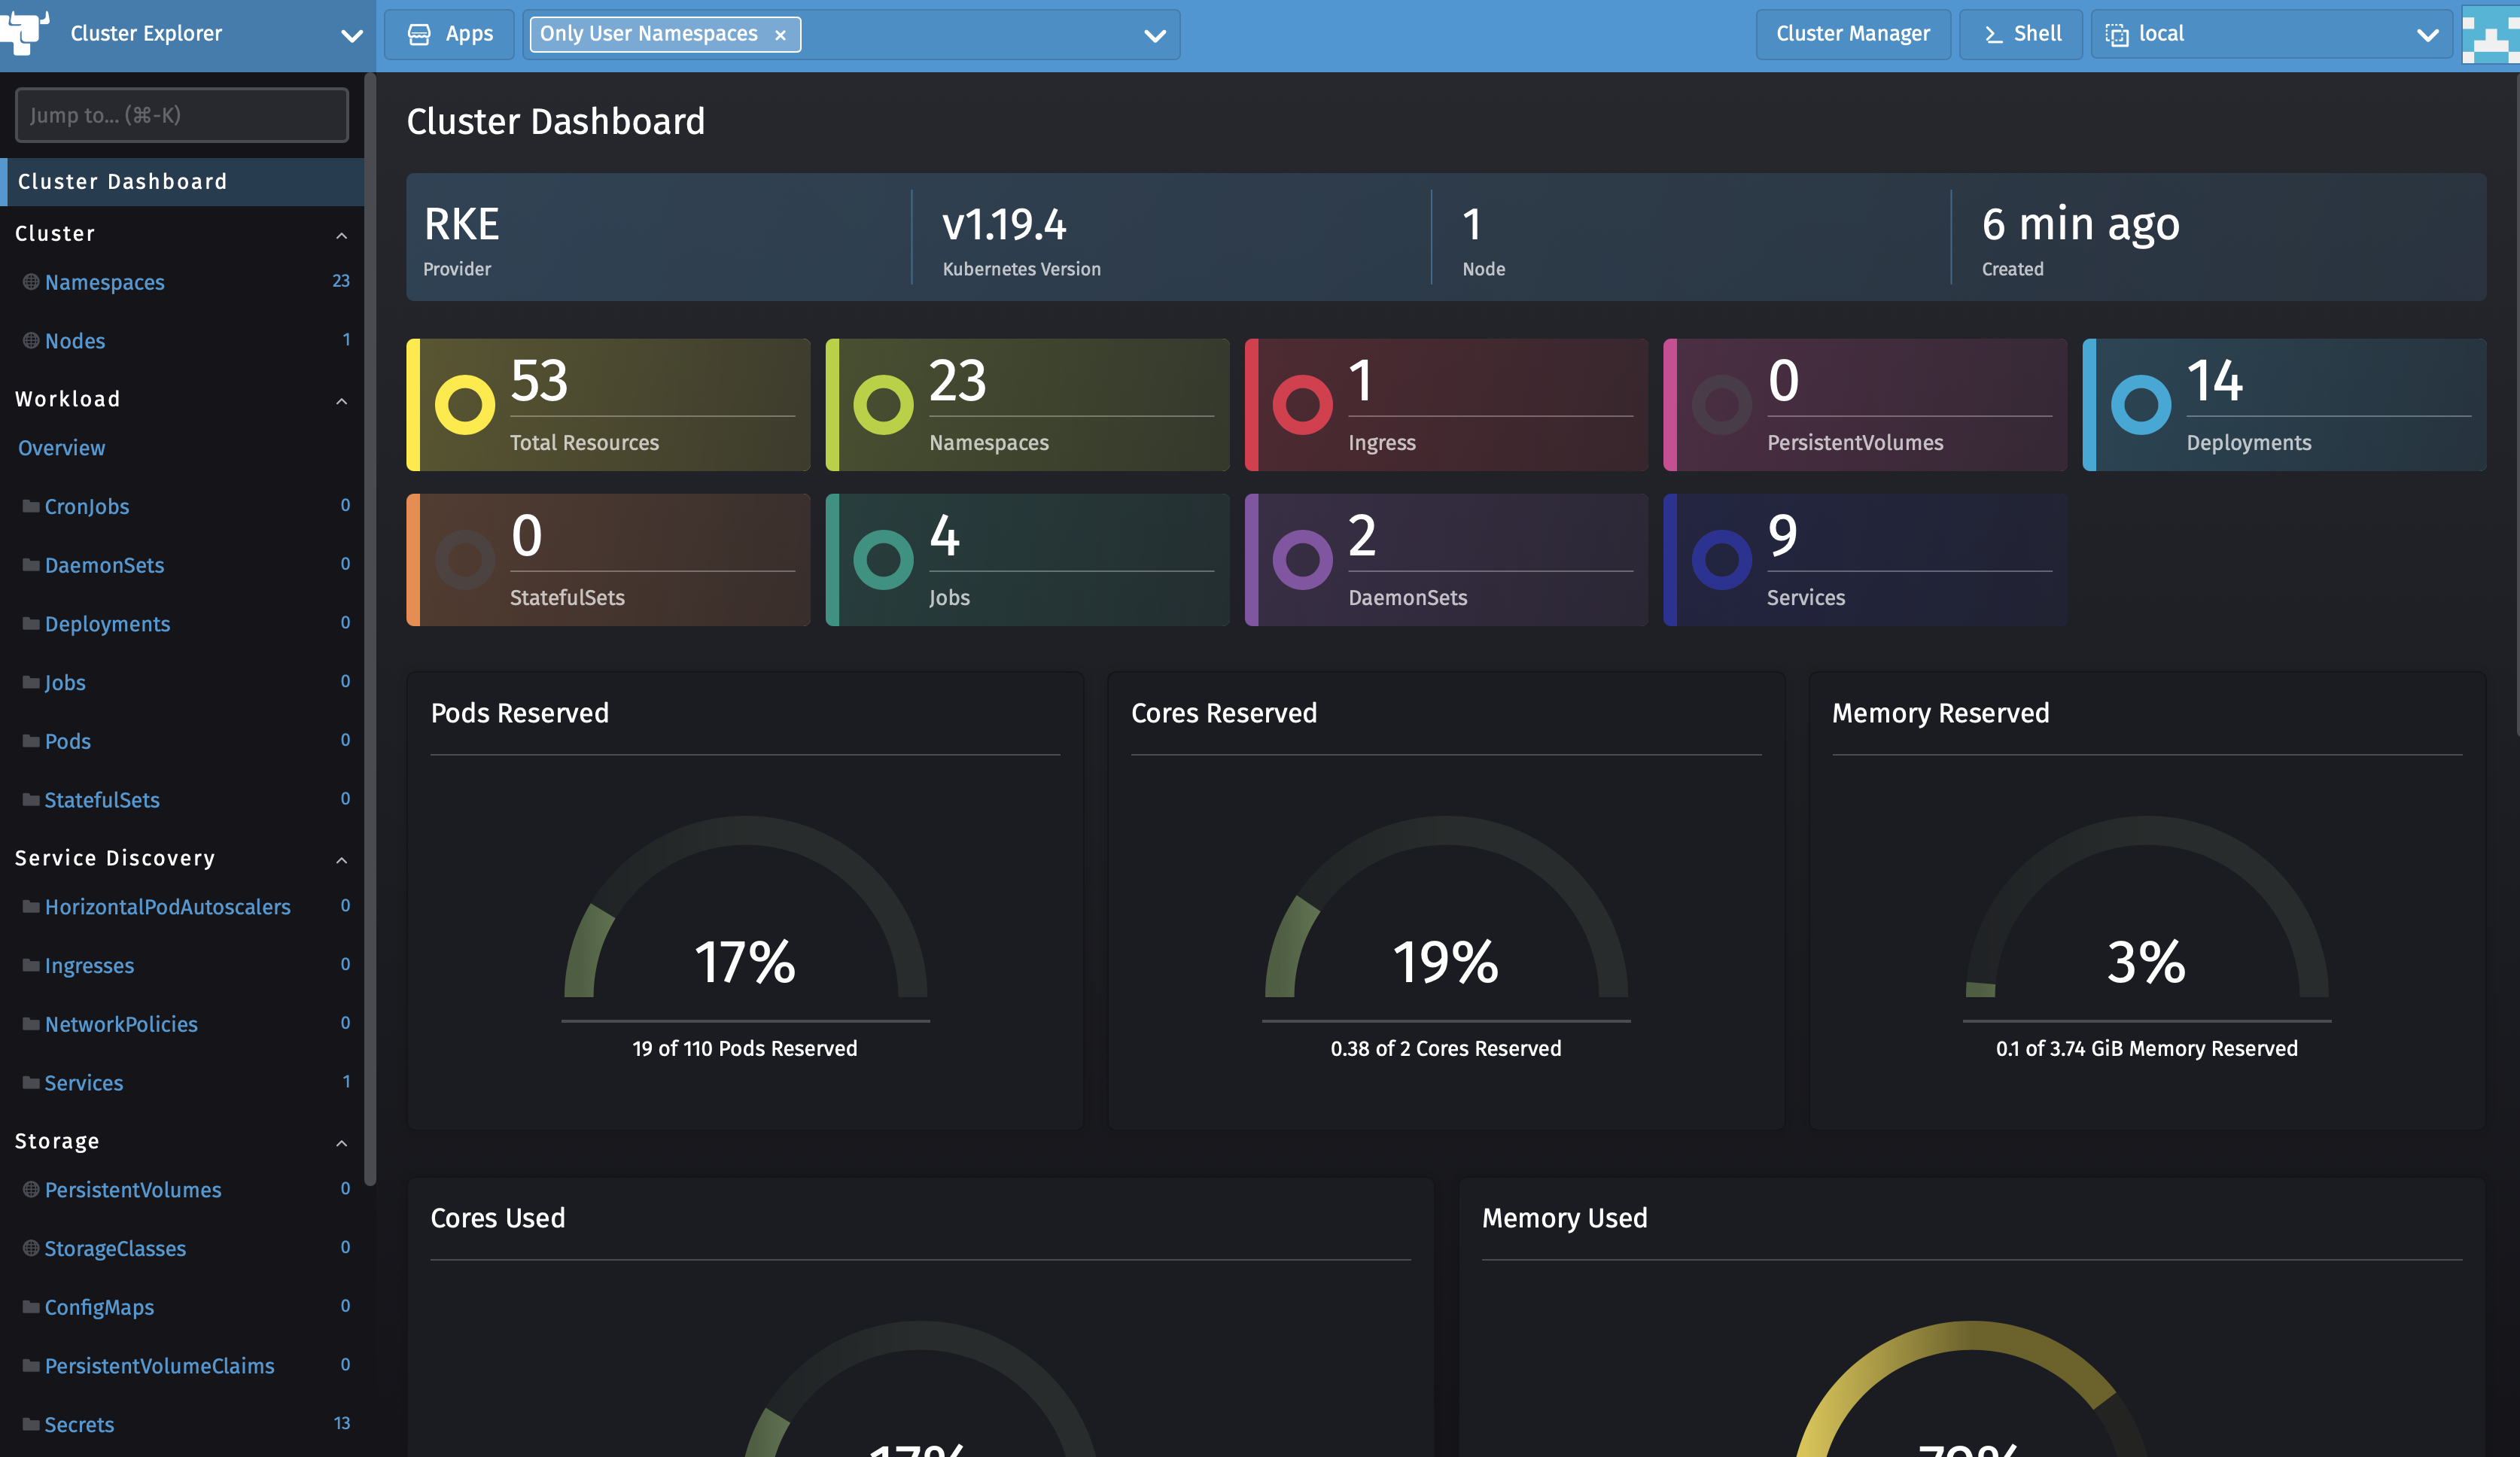
It seems there is a new version of the rancher webui, but I stay on the “old” one :
Pods
So, now, we will deploy our first containers, or pods, with the help of workloads. If you are familiar with docker, you will not be lost.
As I do not have a lot of storage nor performance on rke node, and it is only to test and play, the pods will be the following :
one php container serving index.php file
one nginx container serving the http frontend and redirecting requests to the php containers
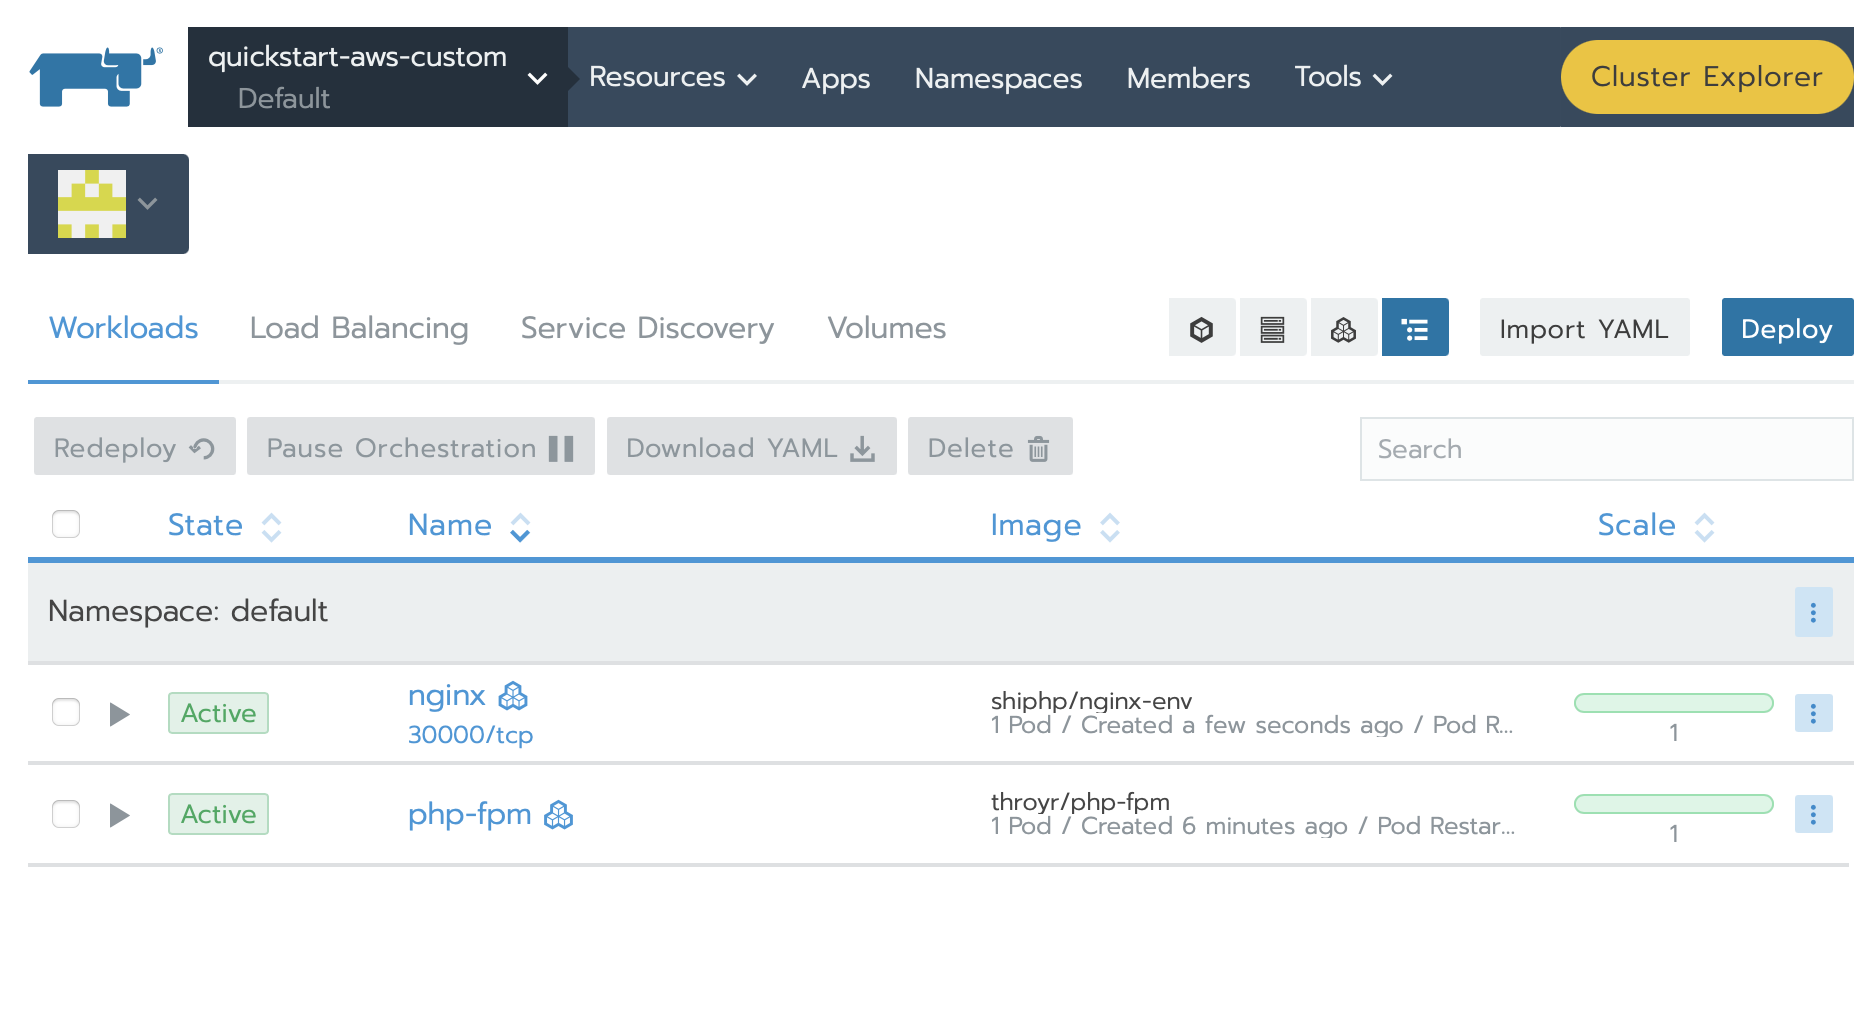
We go to the node of our choice, choose the default project, and then tab Workload. Then, deploy nginx :
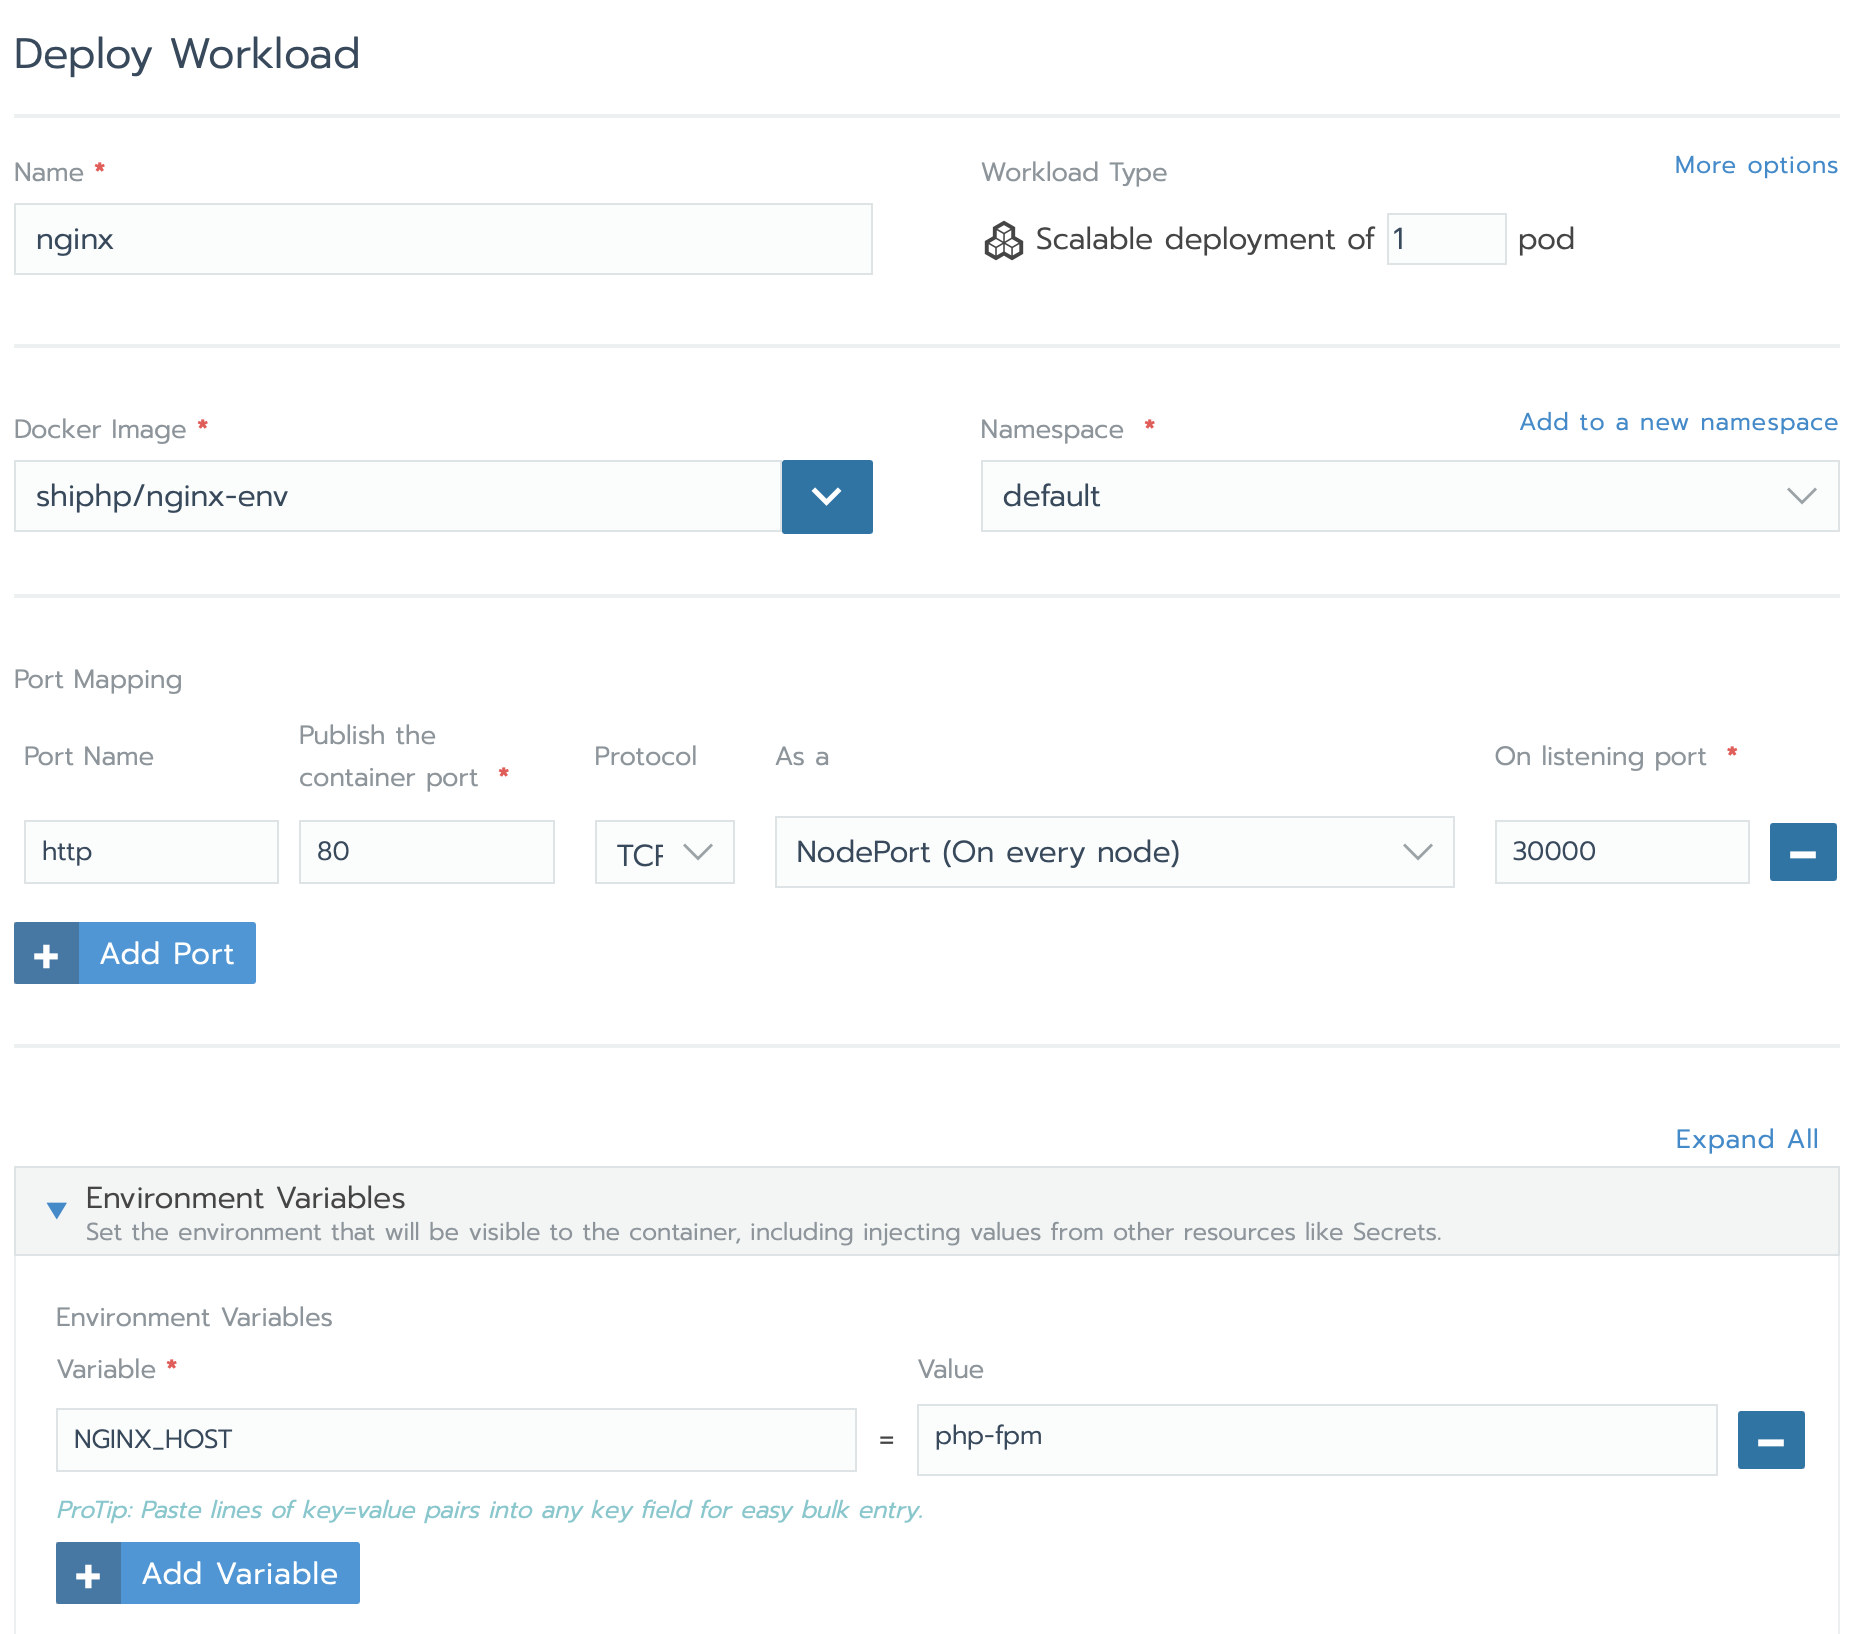
We set up the workload to pull the docker image shiphp/nginx-env, and we do a port mapping. The endpoint port there will be port 30000.
We also set an environment variable, with the value php-fpm.
PHP containers
I have created a Dockerfile, to build a docker container on my machine, and then push it into dockerhub. This assume, you have a dockerhub account.
So, I have an index.php file with this content :
<html>

<body>
<?php
echo 'Today, ' . date('F jS, Y') . ' is maybe the day we fly away!';
?>

</br>
<H1>Isn't Canada a wonderful place?</H1>

</br>
<H3>You are on container :
<?php
echo gethostname();
?>
</H3>

</br>
<H3>Hosted on k8s</H3>

</body>
</html>
An opcache.ini file :
[opcache]
opcache.enable=${PHP_OPCACHE_ENABLE}
opcache.memory_consumption=${PHP_OPCACHE_MEMORY_CONSUMPTION}
opcache.max_accelerated_files=${PHP_OPCACHE_MAX_ACCELERATED_FILES}
opcache.revalidate_freq=${PHP_OPCACHE_REVALIDATE_FREQUENCY}
opcache.validate_timestamps=${PHP_OPCACHE_VALIDATE_TIMESTAMPS}
And the webserver configuration file :
; Required user, group, and port options
[www]
user = www-data
group = www-data
listen = 127.0.0.1:9000

; Process manager options
pm = ${PHP_FPM_PM}
pm.max_children = ${PHP_FPM_MAX_CHILDREN}
pm.start_servers = ${PHP_FPM_START_SERVERS}
pm.min_spare_servers = ${PHP_FPM_MIN_SPARE_SERVERS}
pm.max_spare_servers = ${PHP_FPM_MAX_SPARE_SERVERS}
pm.max_requests = ${PHP_FPM_MAX_REQUESTS}
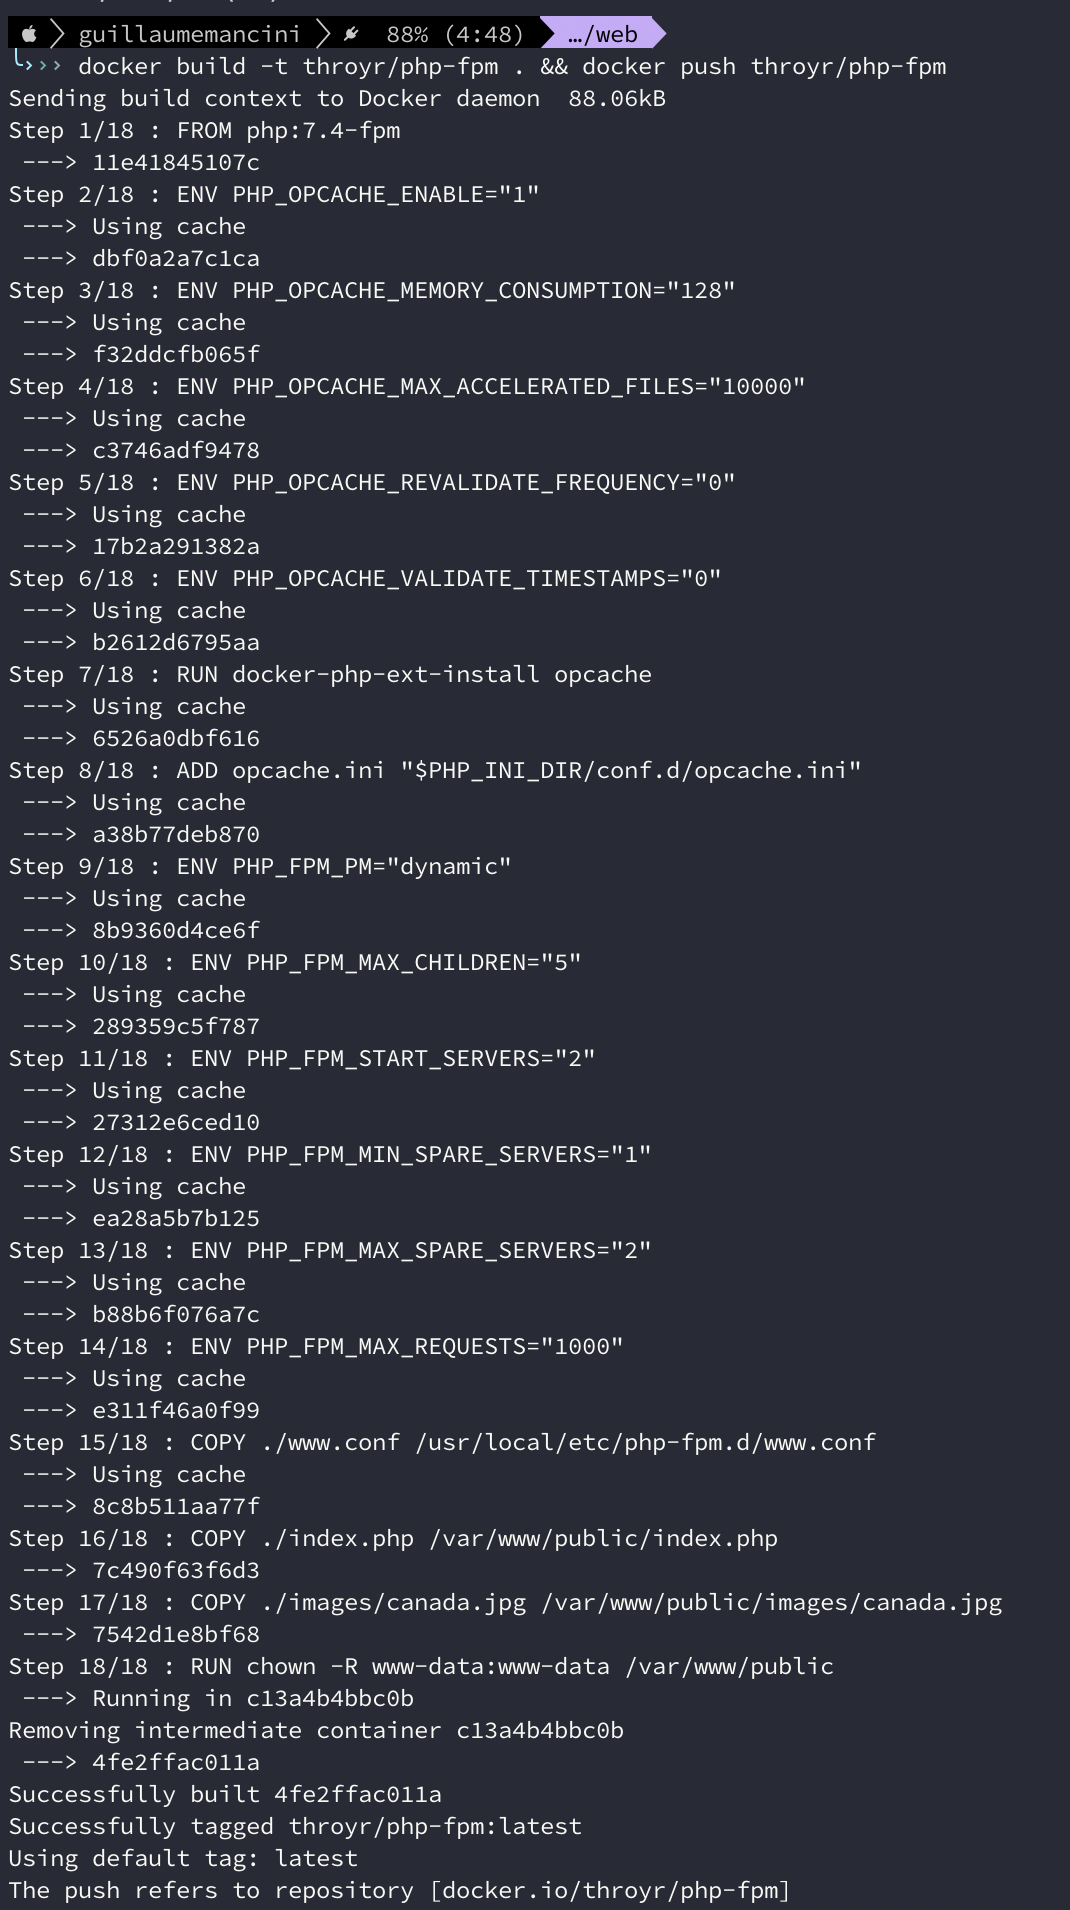
The Dockerfile :
FROM php:7.4-fpm

# OPcache defaults
ENV PHP_OPCACHE_ENABLE="1"
ENV PHP_OPCACHE_MEMORY_CONSUMPTION="128"
ENV PHP_OPCACHE_MAX_ACCELERATED_FILES="10000"
ENV PHP_OPCACHE_REVALIDATE_FREQUENCY="0"
ENV PHP_OPCACHE_VALIDATE_TIMESTAMPS="0"

# Install opcache and add the configuration file
RUN docker-php-ext-install opcache
ADD opcache.ini "$PHP_INI_DIR/conf.d/opcache.ini"

# PHP-FPM defaults
ENV PHP_FPM_PM="dynamic"
ENV PHP_FPM_MAX_CHILDREN="5"
ENV PHP_FPM_START_SERVERS="2"
ENV PHP_FPM_MIN_SPARE_SERVERS="1"
ENV PHP_FPM_MAX_SPARE_SERVERS="2"
ENV PHP_FPM_MAX_REQUESTS="1000"

# Copy the PHP-FPM configuration file
COPY ./www.conf /usr/local/etc/php-fpm.d/www.conf

# Copy the PHP application file
COPY ./index.php /var/www/public/index.php
RUN chown -R www-data:www-data /var/www/public
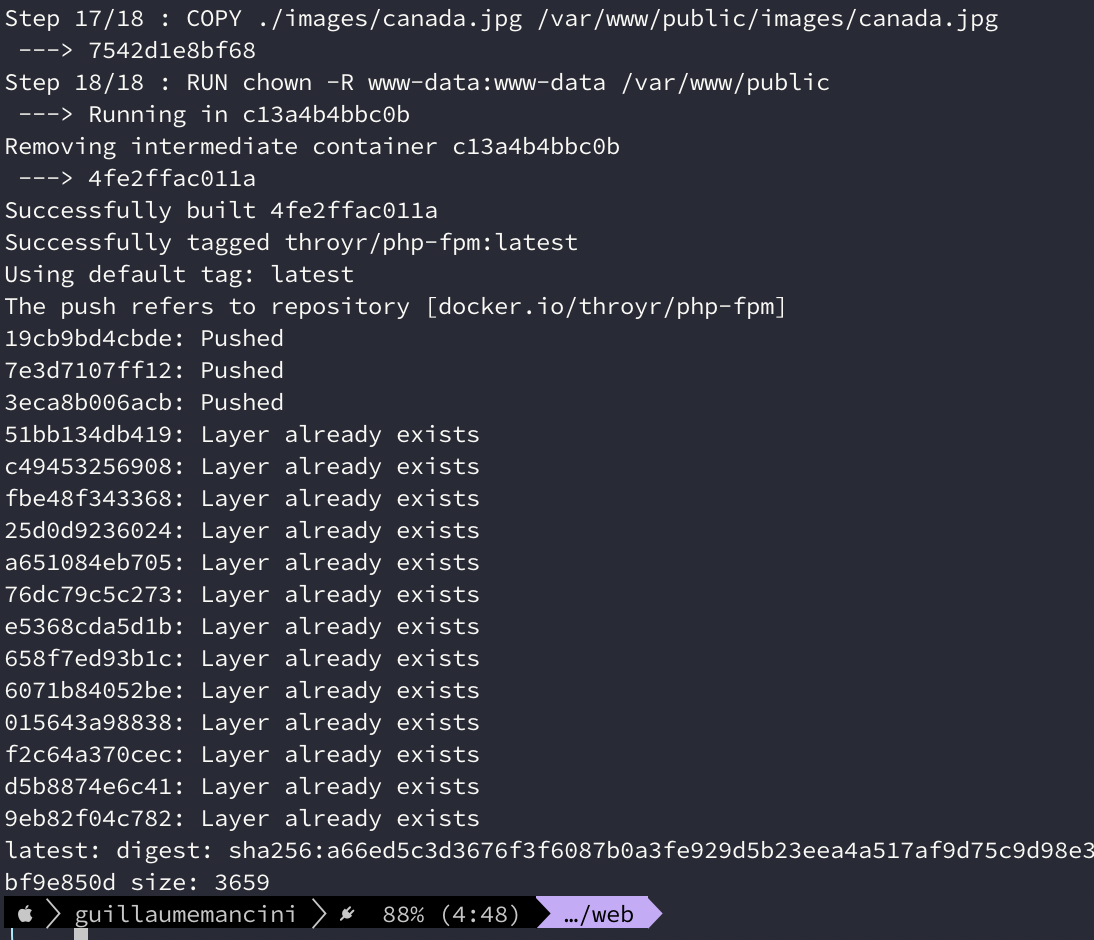
We then build and push :
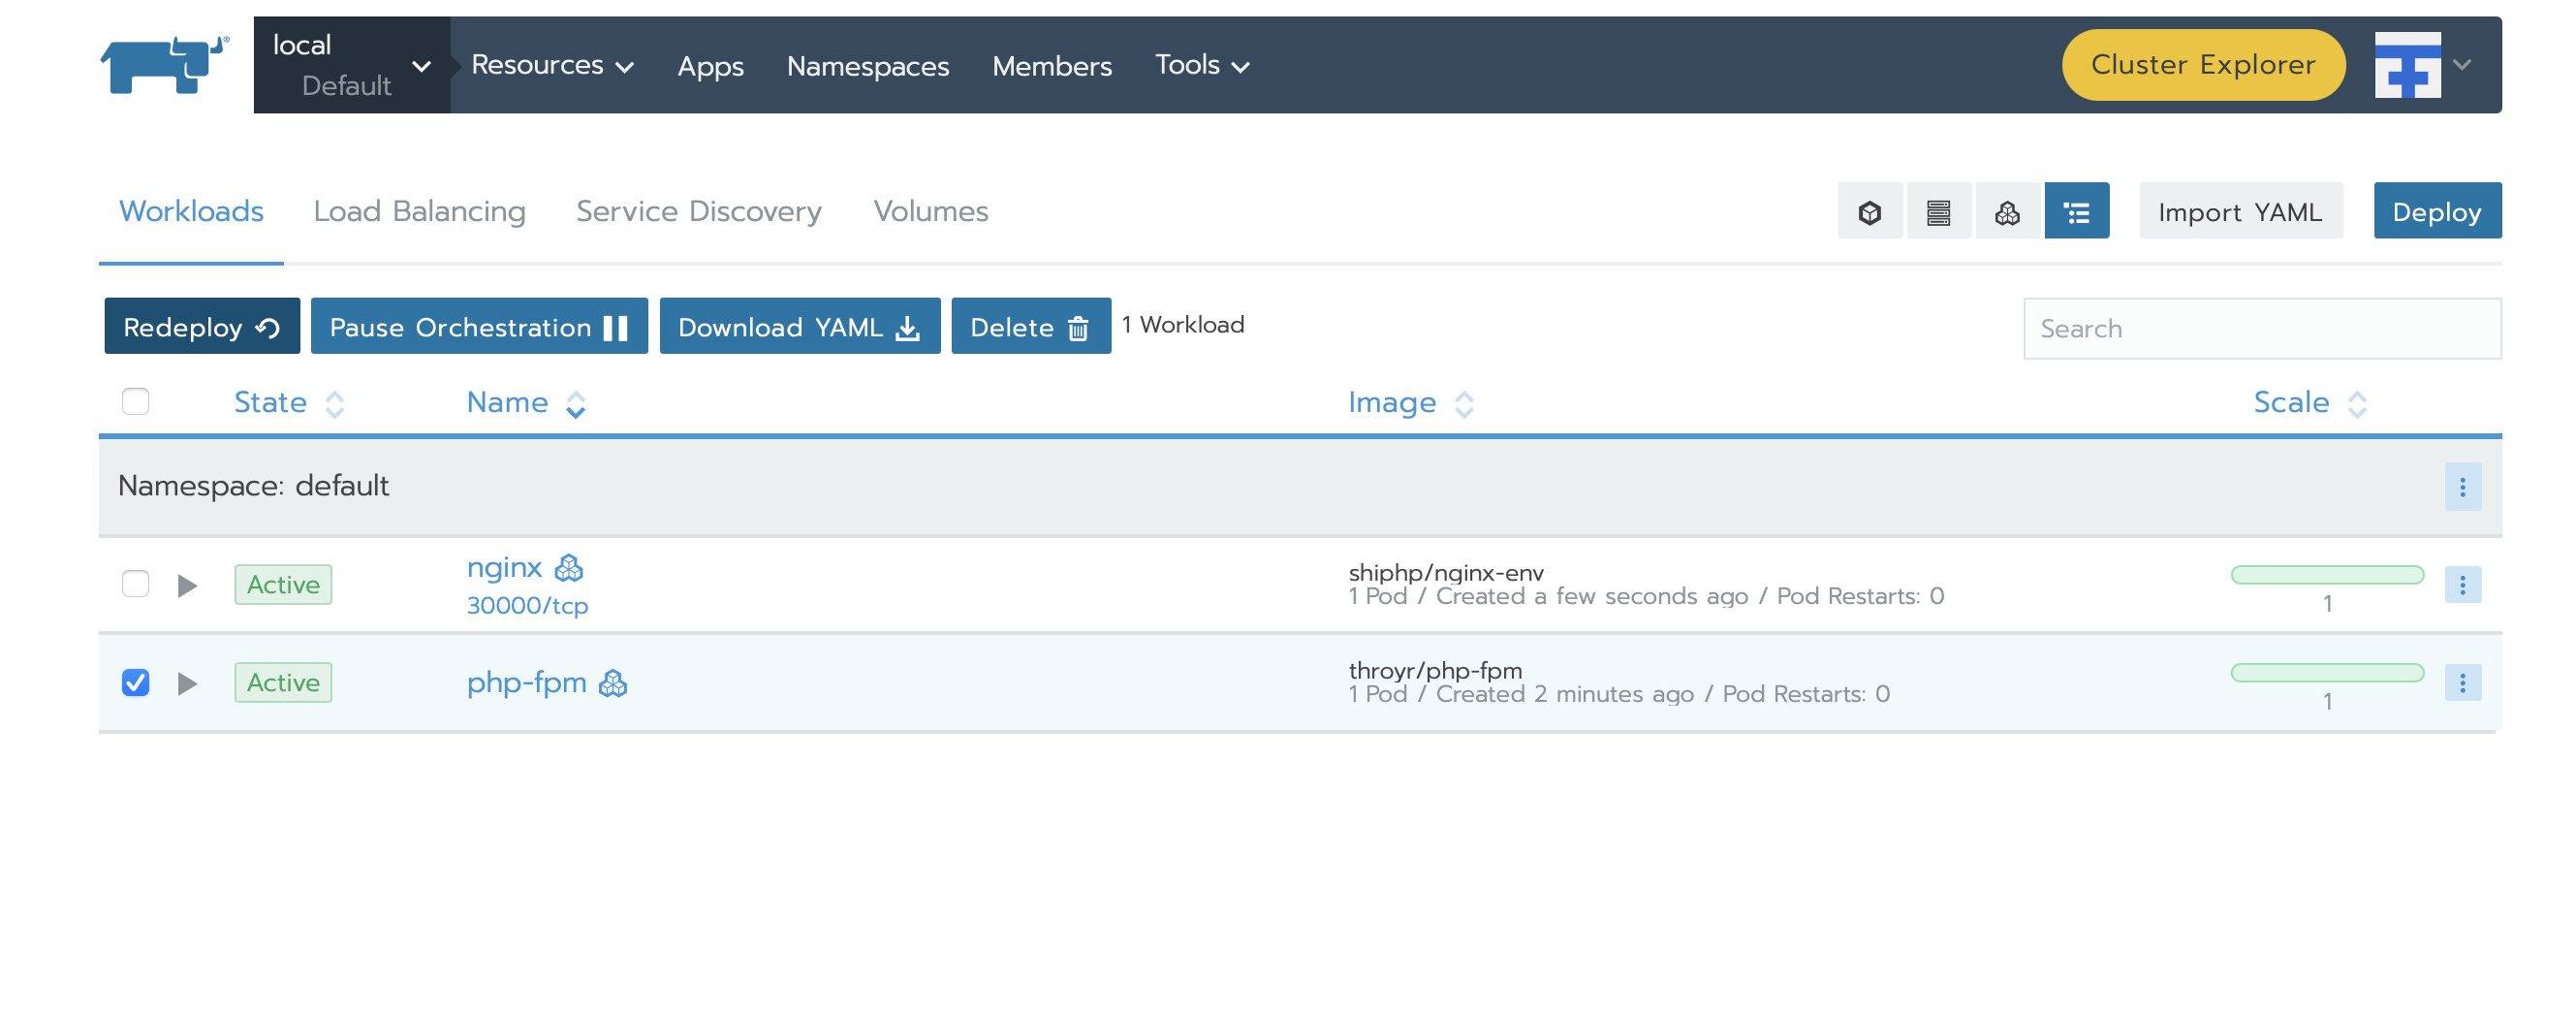
And the same way as nginx workload, we deploy our php workload :
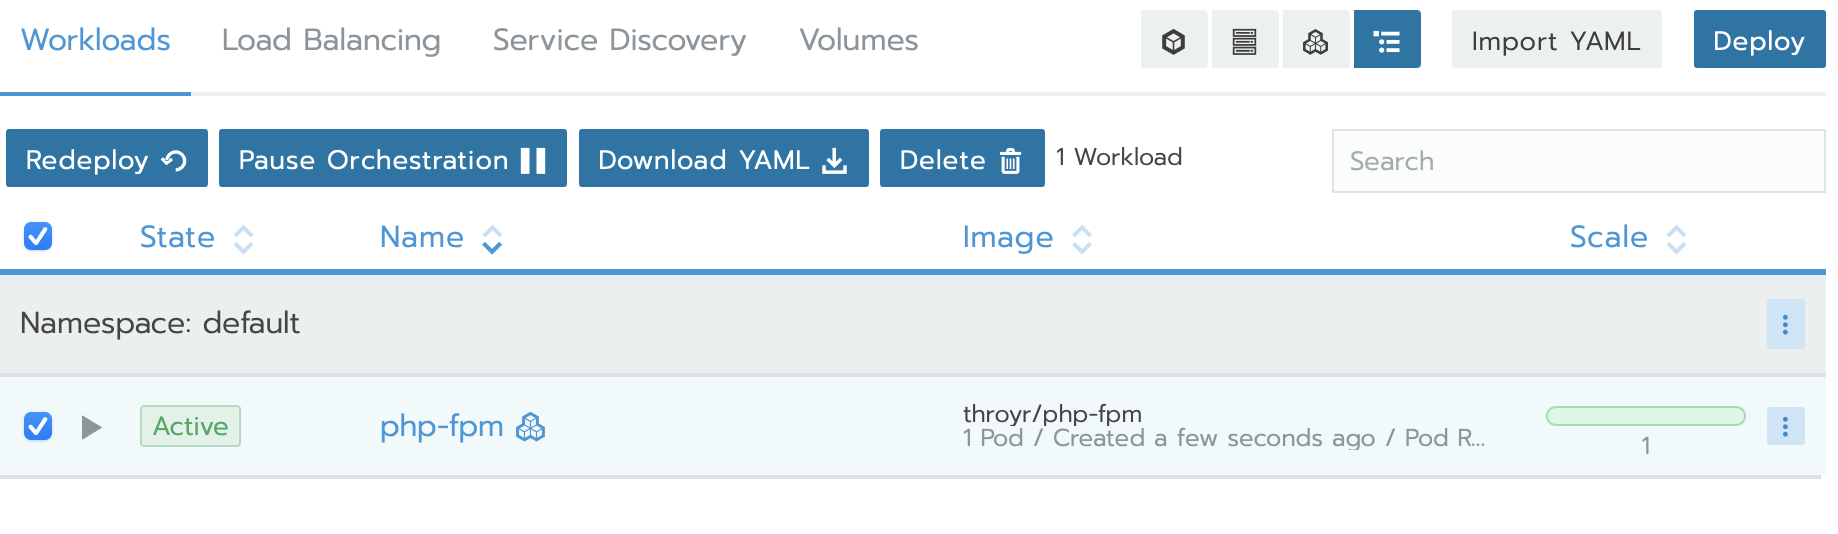
As you can see, I use my own image from dockerhub.
And everything is running :
Note, that if we have a change in our index.php, you can do it locally, rebuild and push your docker container. And you will only need to redeploy the two containers, php-fpm first, then nginx :
If you click on the link below nginx, ‘30000/tcp’ you will be redirected on your web page :
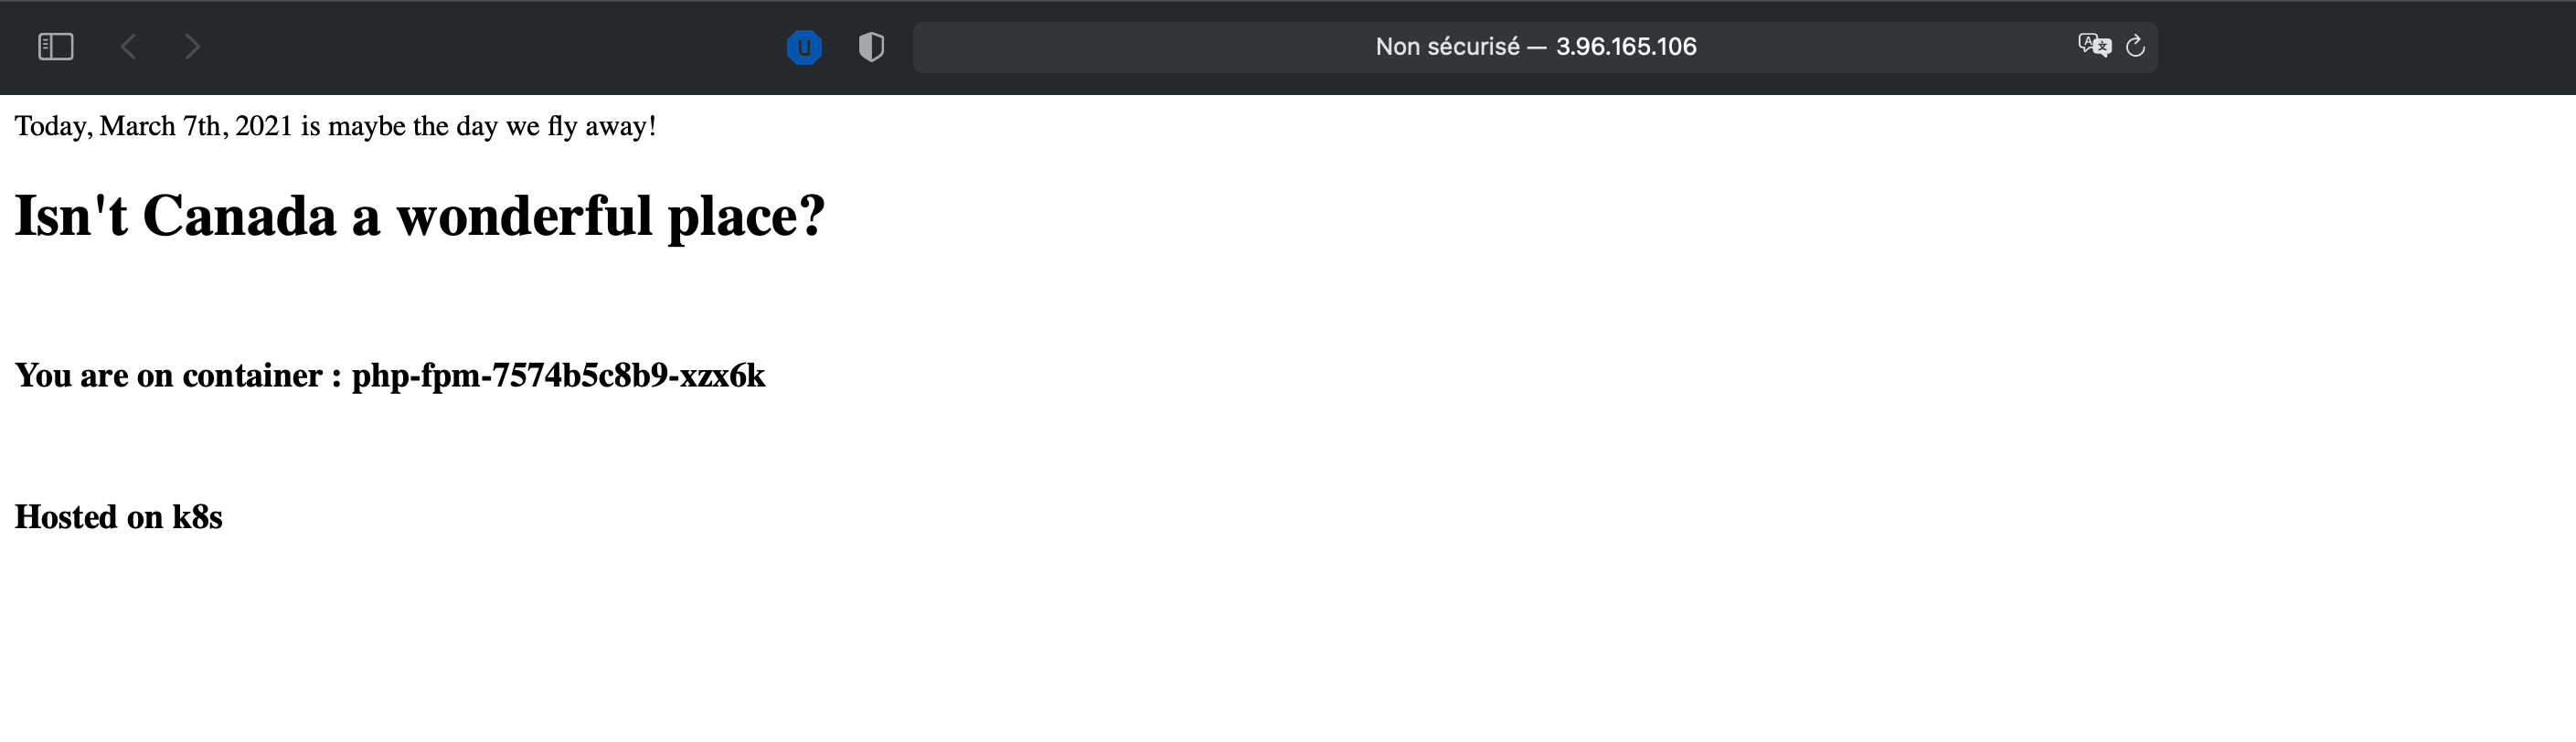
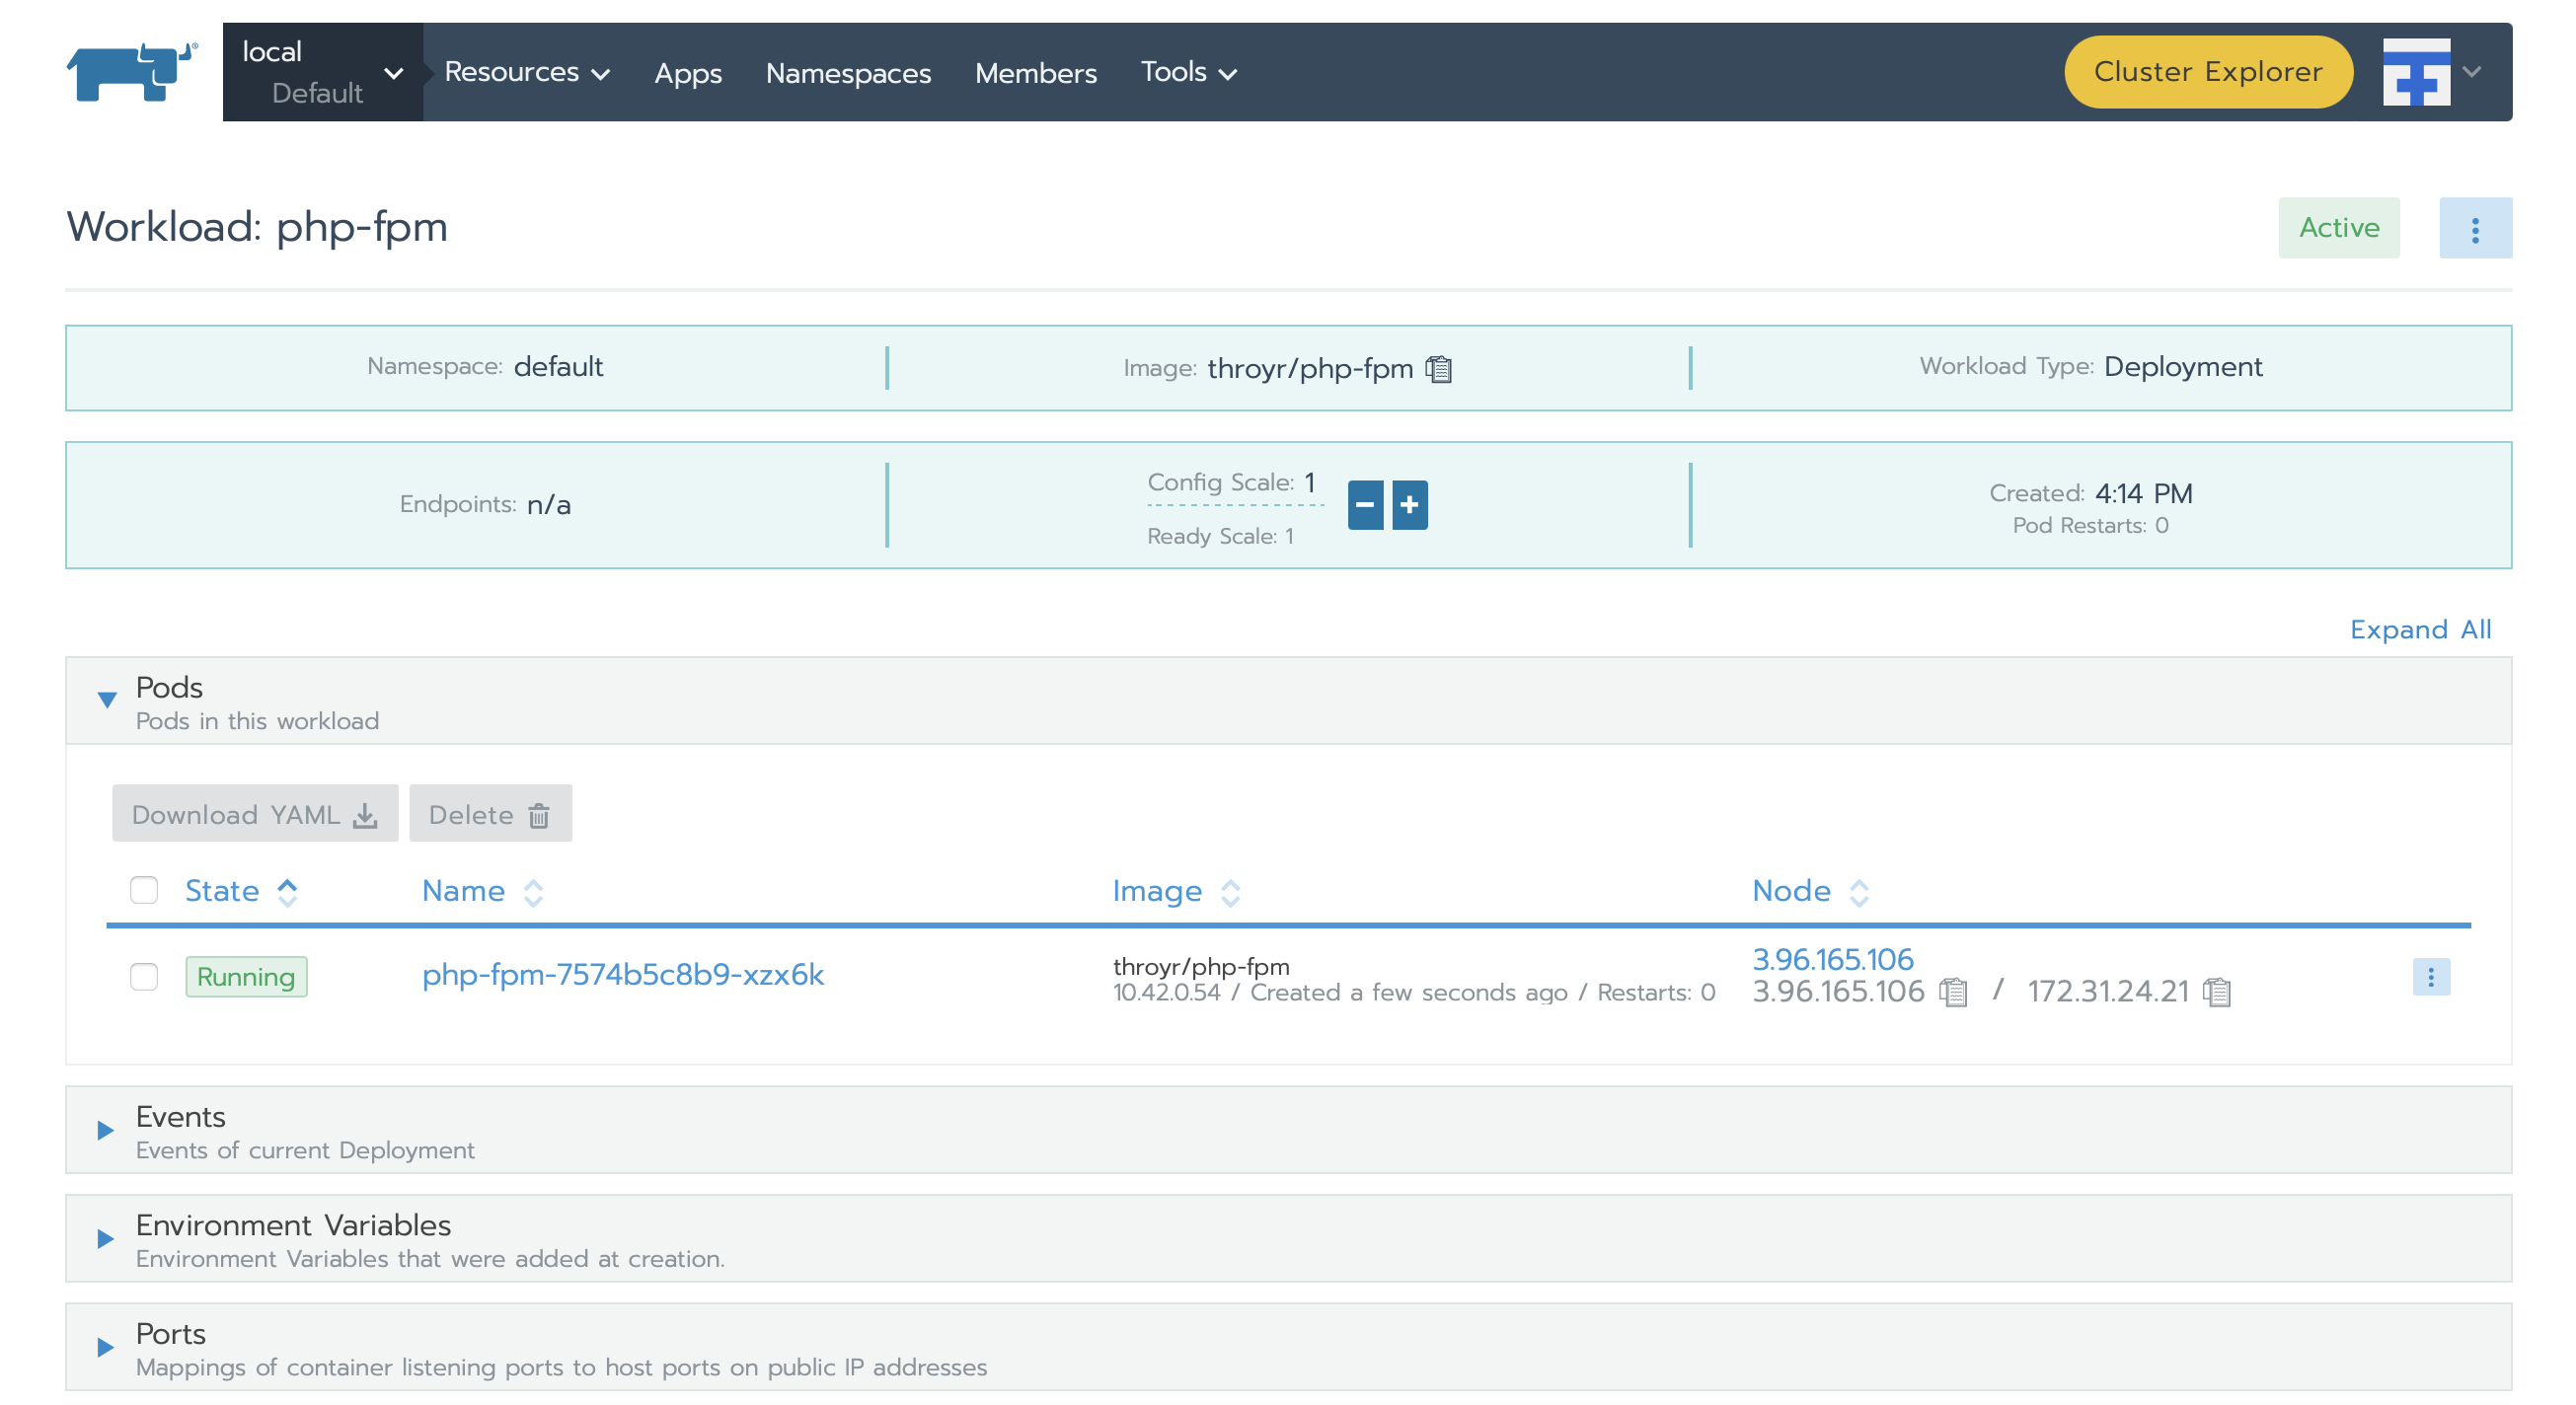
The hostname is rendered by PHP, and it must be our container name, let check it out :
Last Ansible run
I will change the index.html present on the EC2 instance to have a link to our nginx frontend. I only had put a line of html inside the index.html :
Accessible from : http://aws.guillaume-mancini.fr
Final word
As you can see, it is a really simple use case of Terraform, Ansible, and Kubernetes, you can do more complex thing, but it is a first step into Cloud automation.